I still remember the day I brought home my first tillandsia — I stuck it in a glass bowl, watered it once, and watched it slowly turn brown over three weeks. That failure sent me on a two-year deep dive into everything about air plant care. I killed dozens before I finally understood what these fascinating organisms truly needed. Now my collection spans over sixty varieties, and not one has succumbed to neglect, root rot, or disease in the past eighteen months.
Air plant care sounds deceptively simple — no soil, no fuss, right? In reality, these tiny tillandsias live by a precise set of environmental rules. Get them wrong and you face yellowing leaves, fungal rot, bacterial infections, and eventual plant death. Get them right, and you are rewarded with dramatic blooms, pups, and a nearly indestructible living display. This complete guide covers every aspect of proper air plant care, from watering schedules and light requirements to disease diagnosis, pest management, and propagation.
Master these seven evidence-based air plant care principles and your tillandsias will outlive every other houseplant you own for years.
Air Plant Care Basics Every New Grower Must Know:
Air plant care begins with understanding what tillandsias actually are. These epiphytic bromeliads absorb moisture and nutrients directly through tiny leaf structures called trichomes rather than through roots. Their root system exists purely for anchoring, which is why they thrive mounted on driftwood, hung in glass globes, or perched on decorative stones without a single gram of potting mix. Recognizing this biology is the single most important starting point for any beginner stepping into the world of tillandsia cultivation.
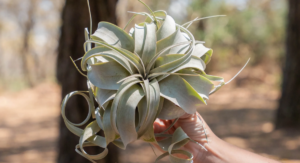
Successful Care for Air Plants also means accepting that these plants come from wildly diverse habitats — humid cloud forests in Central America, arid coastal cliffs in Peru, and subtropical swamps in Florida. That diversity explains why a one-size-fits-all routine consistently fails. Fuzzy, silver-leafed species like Tillandsia xerographica evolved for dry, bright conditions, while smooth, green-leafed varieties such as T. ionantha prefer higher humidity and more frequent misting. Matching your care routine to the natural habitat of your specific variety makes the difference between a plant that merely survives and one that actively thrives.
Air Plant Care Watering Schedule That Actually Works:
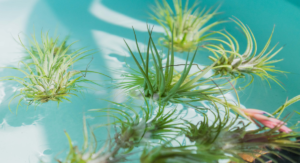
The most critical element of air plant care is water — specifically, providing enough moisture through the trichomes without allowing standing water to collect in the leaf base where bacteria and fungi thrive. The ideal routine involves submerging your tillandsia in room-temperature water for twenty to forty minutes once or twice per week, then shaking off excess moisture and placing it upside-down on a clean towel to drain for two hours before returning it to its display. Rainwater or filtered water produces noticeably healthier plants than chlorinated tap water, which can clog trichomes over time and reduce the plant’s ability to absorb nutrients.
Care for Air Plants watering rules change dramatically with the seasons and your indoor climate. During hot, dry summer months or in homes with forced-air heating, your plants may need soaking three times per week to prevent dehydration, which first appears as leaf curl and a dry, papery texture. In winter or in naturally humid rooms, once-weekly soaking is often sufficient, and excessive moisture becomes the real enemy — promoting the fungal infections and bacterial rot that kill more tillandsias than drought ever does. Invest in a small hygrometer to monitor ambient humidity and adjust your watering frequency accordingly rather than following a rigid calendar schedule.
Warning — Root Rot & Fungal Risk: Never leave your tillandsia sitting in a bowl of water overnight or place it back in an enclosed terrarium while still wet. Prolonged moisture trapped between leaves creates the perfect anaerobic environment for Fusarium fungal infections and soft-rot bacteria such as Erwinia, both of which destroy leaf tissue within days and spread to neighboring plants.
Air Plant Care Quick-Reference Guide 10 Key Variables:
| Care Factor | Recommended Range | Common Problem | Status |
| Watering Frequency | 2–3×/week (summer), 1×/week (winter) | Root rot from overwatering | Essential |
| Light Exposure | Bright indirect, 4–6 hrs/day | Yellow leaves from too little light | Essential |
| Temperature | 60–90°F (15–32°C) | Cold damage below 45°F | Moderate |
| Humidity | 40–70% RH | Tip browning from dry air | Moderate |
| Air Circulation | Good airflow at all times | Fungal disease without airflow | Critical |
| Fertilizer | Diluted bromeliad fert. monthly | Tip burn from nitrogen excess | Optional |
| Drainage Time | Min. 2 hrs after soaking | Bacterial rot from trapped water | Critical |
| Water Quality | Rain, filtered, or aquarium water | Trichome damage from chlorine | Important |
| Display Method | Open mounts, not sealed terrariums | Mold growth without ventilation | Critical |
| Propagation Check | Inspect pups monthly for disease | Virus spread between offsets | Moderate |
Air Plant Care Light Requirements Explained for Beginners:
Light is the engine behind every healthy air plant care routine, driving photosynthesis, color development, and bloom production. Understanding the nuances of intensity, direction, and duration will dramatically improve your results.
1. Indirect Light Rules:
Proper air plant care requires placing your tillandsia within one to three feet of a bright window that receives no direct afternoon sun. East-facing windows are ideal — they provide gentle morning light without the scorching intensity that causes bleached, crispy leaves. Silver-leafed xeric varieties tolerate slightly more direct sun, but mesic green-leafed species will sunburn within hours of direct midday exposure. Filtered light through a sheer curtain is always a safe compromise.
2. Grow Lights Work:
Artificial lighting is a fully viable option for air plant care in low-light homes or offices. Full-spectrum LED grow lights set at 6,500K positioned eight to twelve inches above the plant for ten to fourteen hours daily provide equivalent energy to a bright windowsill. Avoid warm-spectrum bulbs below 3,000K, as they produce insufficient blue-wavelength light for healthy trichome development and leaf structure. A programmable timer eliminates the guesswork of consistent photoperiod management.
3. Seasonal Adjustment Tips:
Seasonal shifts significantly affect Care for Air Plants lighting needs. In winter, when sunlight angles drop and day length shortens, move plants two to three feet closer to windows and consider supplementing with grow lights for an additional two hours daily. Summer brings the opposite challenge — protecting plants from intense afternoon rays that can spike leaf surface temperatures high enough to denature the trichome proteins that make moisture absorption possible, causing irreversible brown patches.
Air Plant Care Disease Identification and Treatment Methods:
Disease management is the most underestimated aspect of air plant care. Recognizing the difference between fungal infections, bacterial diseases, and viral issues early gives you the best chance of saving affected plants and protecting your collection.
1. Fungal Infection Signs:
Fungal pathogens are the leading killer in air plant care, typically manifesting as dark brown or black soft spots at the leaf base that spread rapidly in wet, stagnant conditions. Botrytis cinerea (gray mold) appears as fuzzy gray growth on damaged tissue, while Fusarium species cause a dry, reddish-brown discoloration accompanied by a faint musty odor. Isolate affected plants immediately, remove diseased leaves with sterilized scissors, and treat with a diluted neem oil solution or a copper-based fungicide spray.
2. Bacterial Rot Causes:
Bacterial infections in Care for Air Plants are almost always caused by waterlogged conditions that deprive leaf tissue of oxygen. Soft, water-soaked brown patches — particularly around the central cone of the plant — indicate bacterial rot caused by Erwinia or Pseudomonas species. Unlike fungal disease, bacterial infections move quickly and produce a distinctive foul smell. Remove all infected tissue, apply a diluted hydrogen peroxide solution (3% concentration, 50/50 with water), and dramatically improve drainage time for all remaining plants in your collection.
3. Virus and Microorganism Issues:
Viral infections are rare but devastating in air plant care, as there is no chemical cure once a plant is infected. Symptoms include mosaic-patterned yellow and green mottling on leaves, stunted pup development, and distorted new growth that never straightens. Viruses spread primarily through infected tools, contaminated water, and sap-sucking insect vectors like fungus gnats and mites. The only effective management is immediate removal and destruction of infected plants along with rigorous tool sterilization using 70% isopropyl alcohol between every plant you handle.
Air Plant Care Yellow Leaves Diagnosis and Solutions:
Yellow leaves are the most common distress signal in air plant care, but the underlying cause varies widely from nutrient deficiency and overwatering to light starvation and viral infection — each requiring a completely different response.
1. Overwatering Yellow Signs:
In air plant care, yellowing that begins at the base of leaves and progresses upward almost always signals excessive moisture. When the innermost leaves of a tillandsia turn pale yellow and feel soft or mushy rather than firm, root-zone fungal activity or bacterial rot is actively destroying basal tissue. Immediately stop all watering, remove the plant from any enclosed display, and allow it to dry completely for four to five days in a warm, well-ventilated spot before reassessing and resuming a lighter watering schedule.
2. Nutrient Deficiency Yellowing:
Uniform pale yellowing across all leaves in air plant care typically indicates nitrogen deficiency, particularly in plants that have not received fertilizer for six months or more. Tillandsias absorb nutrients directly through trichomes during their soaking period, so adding a quarter-strength bromeliad or orchid fertilizer to their soaking water once per month significantly improves leaf color, vigor, and bloom production. Iron deficiency causes a distinct interveinal yellowing pattern where leaf veins remain green while tissue between them fades — address this with a foliar spray of diluted chelated iron solution.
3. Light Starvation Effects:
Inadequate light is a frequently overlooked cause of yellowing in Care for Air Plants. When a tillandsia receives fewer than three hours of quality light daily, chlorophyll production slows and leaves progressively lose their vibrant green or silver coloration, becoming washed-out and etiolated — stretched and weak. The fix is straightforward: move the plant gradually closer to a bright light source over ten days to prevent sun shock. If no natural light source is adequate, supplement with a full-spectrum LED grow light to restore the photosynthetic activity the plant needs.
Air Plant Care Root Rot Prevention and Recovery Steps:
Root rot is a frequently misunderstood condition in air plant care because tillandsias do not depend on roots for nutrition — yet base rot caused by prolonged moisture, microorganism colonization, and anaerobic conditions destroys the structural anchor and spreads to living leaf tissue rapidly.
1. Identifying Base Rot:
In proper air plant care, healthy tillandsia bases are firm, pale green or white, and dry within two hours of soaking. Base rot — caused by fungi including Phytophthora and Pythium species along with anaerobic bacteria — turns basal tissue dark brown or black, visibly soft, and foul-smelling. The most reliable diagnostic test is to gently tug the innermost leaves: if they pull free from the base with no resistance, rot has already destroyed the internal tissue connections, and recovery is unlikely without immediate surgical removal of all affected portions.
2. Drying-Out Method:
Early-stage base rot in air plant care can sometimes be reversed using a strict drying protocol. Remove the plant from its mount, trim all visibly affected tissue with sterilized scissors dipped in 70% isopropyl alcohol, dust the cut surfaces with powdered cinnamon (a natural antifungal microorganism inhibitor), and place the plant cut-side-down in a warm, bright location with maximum airflow for forty-eight to seventy-two hours. Only resume watering once the treated area has fully callused, and switch exclusively to misting rather than soaking for the following two weeks to minimize moisture accumulation at the healing base.
3. Prevention Best Practices:
Preventing root rot is far easier than treating it in Care for Air Plants. The three non-negotiable prevention strategies are: always drain plants upside-down for at least two hours after soaking, never mount tillandsias in enclosed containers without open ventilation gaps, and avoid using wire mounts or metal frames that trap moisture against the base. Positioning a small fan to provide gentle air movement around your display area keeps surface moisture evaporating quickly and makes the environment inhospitable to the pathogenic fungi and bacteria responsible for virtually all base rot cases.
Air Plant Care Fertilizing Schedule for Maximum Growth:
Fertilizing is an optional but highly rewarding part of air plant care that accelerates bloom production, encourages vigorous pup development, and improves overall resilience against pest pressure and disease organisms.
1. Best Fertilizer Types:
The most effective fertilizers for air plant care are water-soluble, urea-free formulations designed for bromeliads or orchids, as urea nitrogen cannot be absorbed through leaf trichomes and instead feeds harmful microorganism populations on the leaf surface. A 17-8-22 balanced formula diluted to one-quarter the recommended concentration and added to soaking water once monthly provides macronutrients and trace minerals without the salt buildup that damages trichomes and causes tip browning. Avoid any fertilizer containing copper at more than trace concentrations, as this element is toxic to tillandsias at higher doses.
2. Application Timing Matters:
Timing fertilizer application carefully improves its effectiveness in Care for Air Plants. Apply fertilizer during the spring and summer growing season when tillandsias are actively photosynthesizing and producing new growth. Reduce feeding to every six to eight weeks in autumn and stop entirely during winter dormancy unless your plants are under grow lights maintaining a consistent summer-like photoperiod. Never fertilize a plant that is already showing signs of disease, yellow leaves, or stress — concentrated nutrients accelerate pathogen growth and worsen existing infections rather than helping the plant recover.
3. Organic Fertilizer Options:
Natural fertilizer sources work beautifully for air plant care and carry lower risk of trichome damage than synthetic alternatives. Aquarium water from freshwater fish tanks is particularly effective — it contains dissolved fish waste rich in nitrogen, potassium, and beneficial microorganism metabolites that tillandsias absorb with exceptional efficiency. Diluted worm-casting liquid (vermicompost tea) at a ratio of one part concentrate to ten parts water provides a full spectrum of slow-release nutrients and beneficial microorganisms that compete against pathogenic fungi and bacteria, effectively functioning as both fertilizer and biological disease suppressant.
Air Plant Care Display Ideas to Showcase Your Collection:
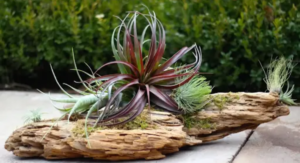
How you display your tillandsias directly affects their health. Air plant care succeeds when displays prioritize airflow, light access, and easy removal for regular soaking without damaging the plant or its mounting.
- Mount air plants on driftwood pieces for natural, breathable, rot-resistant displays.
- Hang individual tillandsias in open geometric wire frames near bright windows.
- Place air plants on decorative river stones arranged inside shallow open bowls.
- String multiple air plants along copper wire for dramatic vertical wall art installations.
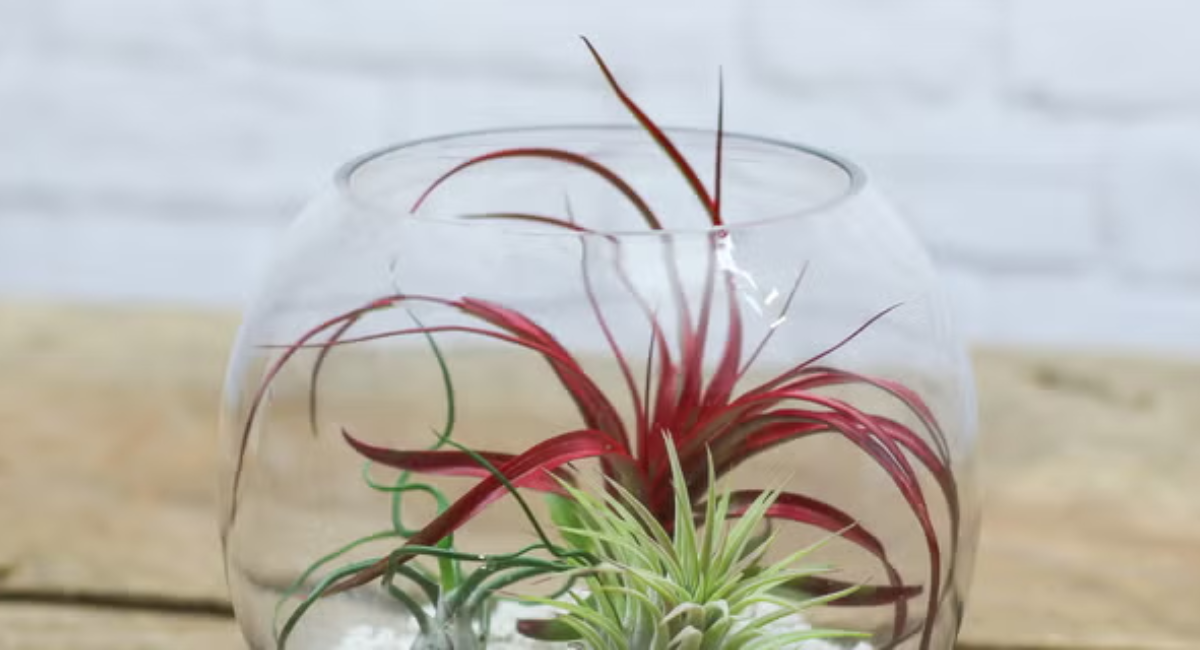
- Display air plants inside open terrariums ensuring ventilation gaps prevent fatal moisture buildup.
Air Plant Care Mistakes Every Beginner Must Absolutely Avoid:
Learning what not to do is equally as important as following the right air plant care practices. These five mistakes cause the majority of tillandsia fatalities in beginner collections worldwide.
- Never place air plants inside sealed terrariums without adequate ventilation or airflow.
- Avoid using tap water with high chlorine levels that damage delicate leaf trichomes.
- Do not mist air plants without ensuring thorough drying within four hours afterward.
- Never glue air plants directly onto mounts — use wire, twine, or safe adhesive.
- Stop fertilizing stressed or diseased air plants until full health is completely restored.
Pro Tip: The single fastest way to improve your air plant care results is to swap sealed terrariums and opaque bowls for open wire frames and driftwood mounts. That one change eliminates the majority of fungal and bacterial disease cases overnight.
Conclusion
Mastering air plant care means understanding that tillandsias are not low-maintenance — they are differently-maintained. They reward attention to moisture management, light quality, airflow, and early disease detection with extraordinary longevity and spectacular blooms. Apply these seven principles consistently, stay alert to the early warning signs of fungal infection, bacterial rot, yellow leaves, and virus damage described above, and your collection will reward you year after year.
FAQ’s
Q1. How often should I water my air plant?
Soak your air plant two to three times weekly during summer and once weekly in winter.
Q2. Why are my air plant’s leaves turning yellow?
Yellow leaves on an air plant indicate overwatering, nutrient deficiency, or insufficient daily light exposure.
Q3. Can air plants get fungal infections?
Yes — improper air plant care with poor drainage leads to Fusarium and Botrytis fungal infections quickly.
Q4. What is root rot in air plants?
Base rot in an air plant is fungal or bacterial decay caused by trapped moisture at the base.
Q5. Do air plants need fertilizer to grow well?
Monthly bromeliad fertilizer added to soaking water accelerates healthy air plant growth and bloom production significantly.
Q6. How much light does an air plant need daily?
Your air plant needs four to six hours of bright indirect light or supplemental grow-light daily.
Q7. Can bacteria kill an air plant?
Bacterial species like Erwinia destroy air plant tissue within days if trapped moisture is not eliminated promptly.
Q8. What causes brown tips on air plant leaves?
Brown tips on an air plant result from low humidity, fluoride in tap water, or physical damage.
Q9. How do I prevent disease in my air plant collection?
Sterilize tools, ensure thorough post-soak drainage, and quarantine new arrivals before mixing with existing air plant collections.
Summary
This guide has covered every essential dimension of air plant care — from foundational watering and light principles to advanced disease diagnosis, fungal infection management, yellow leaf troubleshooting, and root rot recovery. Strong Care for Air Plants practices revolve around three non-negotiable habits: thorough drainage after every soaking, consistent bright indirect light, and vigilant early detection of bacterial, fungal, and viral disease symptoms.
Whether you are a first-time grower or an experienced collector expanding your display, applying these evidence-based Care for Air Plants strategies will keep your tillandsias healthy, blooming, and producing new pups for many seasons ahead. Revisit this guide whenever a problem arises — because with the right knowledge, every air plant care challenge has a clear and effective solution.