I had been planting agapanthus plants in the wrong part of my garden for three straight years — a bed along the south side of the house that looked sunny in autumn and winter but was heavily shaded by the eaves and a neighboring grevillea from November through March, precisely the months when agapanthus needs full sun to build the energy reserves that produce those magnificent blue flower towers.
Moving a single established clump to an open, north-facing position the following spring changed everything — the same plant that had produced two sad flower stems in its shaded position gave me fourteen the very next season, without any other change to my soil, watering, or fertiliser routine. Everything I have learned about planting agapanthus plants correctly — from sun requirements and soil preparation to disease prevention, yellowing diagnosis, and root rot management — is laid out in practical, honest detail throughout this guide.
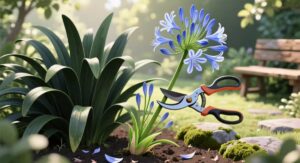
Get planting agapanthus plants right from day one and enjoy towering blue and purple blooms returning more beautifully every season.
Planting Agapanthus Plants Successfully Starts with Choosing the Right Site:
Every subsequent care decision — watering, fertilising, disease management — either works with or against the site you choose, which is why getting the location right before planting agapanthus plants is more important than anything else you will do for this plant’s long-term success.
Agapanthus originates from the coastal cliffs, rocky slopes, and open forest margins of South Africa’s Eastern Cape and KwaZulu-Natal — environments defined by brilliant sunshine for most of the year, fast-draining rocky substrate, and warm temperatures through the growing season. When planting agapanthus plants in a garden setting, we need to recreate these conditions as closely as possible, starting with sunlight.
A minimum of six hours of direct, unfiltered sun is the threshold below which flowering becomes inconsistent and sparse; eight or more hours produces the full, dramatic flowering display that most people buy agapanthus for. The most common mistake I see is site assessment done in the wrong season — a spot that looks open and sunny in June can be significantly shaded from October to March when deciduous trees are in full leaf and the sun angle is high. Always assess your proposed planting location during late spring and summer, not during the leafless winter months, before committing to a planting decision.
Soil drainage is the second critical site variable, and it directly determines whether this plant thrives or succumbs to the Phytophthora and Pythium root rot diseases that are by far the most common cause of established agapanthus decline. Both of these oomycete water molds transition from harmless background soil inhabitants to destructive root pathogens the moment soil becomes chronically waterlogged and oxygen levels around the roots drop below threshold. The practical drainage test is simple but worth taking seriously: dig a test hole thirty centimetres deep, fill it with water, and time how long it takes to drain completely. Suitable sites drain within one to two hours.
Sites that still hold water after three to four hours need significant structural amendment — the addition of coarse grit, horticultural sand, or raised bed construction — before any planting agapanthus plants project has a realistic chance of long-term success. Many gardeners discover this limitation only after losing an entire bed to root rot in a wet winter, which is a painful and avoidable lesson when a ten-minute drainage test beforehand would have identified the problem clearly.
Soil Preparation Steps Before You Start Planting Agapanthus Plants:
Preparing the soil before planting agapanthus plants is a one-time investment that determines whether your plants establish quickly and flower freely, or spend their first several years in a state of slow, frustrating stagnation that most gardeners eventually blame on the plant rather than the preparation.
Start with a soil pH test — this is the step that most home gardeners skip and then wonder why their agapanthus looks perpetually unhealthy despite correct watering and reasonable sunlight. The target pH range for agapanthus is 6.0 to 7.0, slightly acidic to neutral. When pH falls below 6.0, iron and manganese become more soluble and can reach concentrations that damage root membranes even as other nutrients become locked out of availability — the result is the combination of stunted roots and interveinal yellowing that looks like disease but is actually a chemistry problem.
Above 7.5, phosphorus, iron, and manganese all become progressively less available regardless of how much fertiliser you apply. If you test before you plant, you can correct pH using lime for acidic soils or sulfur for alkaline ones, giving the amendment four to six weeks to work before planting day arrives. This single hour of preparation prevents years of frustrating nutrient-related symptoms that no amount of targeted feeding can resolve without first correcting the underlying pH chemistry.
Organic matter incorporation transforms both the drainage capacity and the biological health of soil before planting agapanthus plants. Working in three to four inches of finished compost improves water movement through clay-heavy profiles, adds moisture-holding capacity to sandy soils that drain too aggressively, and — most importantly from a disease management perspective — introduces the beneficial Trichoderma fungal species and competitive bacterial populations that occupy the same root zone niches that pathogenic Fusarium, Pythium, and Phytophthora species would otherwise colonise.
A controlled-release balanced granular fertiliser mixed into the backfill at label rates provides the phosphorus and potassium that support root establishment in the first season without the nitrogen surge that high-N amendments deliver. High nitrogen at planting pushes rapid foliar growth at the expense of the root development your plants need most immediately after going into the ground — a mistake that produces impressively leafy first-year plants that fail to flower for three or four seasons while their root systems struggle to catch up.
Planting Agapanthus Plants Reference Guide Every Key Variable Explained:
Use this table as your complete reference before and after planting — it captures every essential care variable, the most common mistake growers make at each stage, and clear status guidance to keep your plants on track from establishment through full maturity.
| Care Variable | Ideal Requirement | Most Common Mistake | Status |
| Sunlight | Full sun; minimum 6–8 hours direct daily; north-facing open sites preferred | Assessing sun in winter — site appears sunny but is summer-shaded by trees | Full sun required |
| Soil Drainage | Free-draining sandy loam; drainage test clears within 1–2 hours after filling | Heavy clay sites cause chronic waterlogging and rapid Phytophthora root rot | Test before planting |
| pH Level | 6.0–7.0 for full nutrient availability and healthy root membrane function | No pH test — acidic or alkaline soil causes nutrient lockout and yellowing | Test and amend early |
| Planting Depth | Crown at or just below the soil surface — no deeper than 3–5 cm maximum | Deep planting suppresses crown temperature signals that initiate flower stems | Shallow is always right |
| Plant Spacing | 45–60 cm between plants; mild root crowding over time improves bloom density | Wide spacing delays the root congestion that stimulates prolific flowering | Closer helps blooming |
| Watering | Regular in first season; drought tolerant from year two; reduce in winter | Winter overwatering of established clumps causes crown and root rot disease | Reduce in dormancy |
| Fertiliser Timing | Balanced slow-release in early spring; low-N formula through flowering season | High-nitrogen summer feeding promotes leafy growth over flower stem production | Switch formula at bloom |
| Mulching | 2–3 cm deep to drip line; always maintain a clear gap around the crown | Volcano mulching against the crown creates collar rot fungal conditions rapidly | Crown must stay dry |
| Clump Division | Every 5–7 years in autumn when bloom density has noticeably declined | Dividing too soon before clumps mature removes the mild crowding that aids bloom | Patience produces flowers |
| Disease Watch | Inspect for ink disease, root rot, and crown softening every two to three weeks | Ignoring early yellowing or crown discolouration allows disease to spread widely | Early detection critical |
Correct Depth and Spacing When Planting Agapanthus Plants Today:
Planting depth and spacing are the two most frequently misunderstood technical requirements of planting agapanthus plants — and getting either one wrong reliably produces either non-flowering plants or clumps that are so spread out they take five years to reach the density at which agapanthus truly performs at its best.
1. Rhizome Crown Position:
The crown of the agapanthus rhizome — the growing point from which all leaves and flower stems emerge — should sit at or only just below the soil surface when planting agapanthus plants in any situation. A planting depth of two to five centimetres for the crown is the safe range; anything deeper than this dampens the soil temperature signals at the growing point that the plant uses to time its flowering initiation. Burying the crown six, eight, or ten centimetres down, as many well-meaning first-time growers do out of caution against drought stress, consistently produces non-flowering specimens with oversized, rank foliage.
2. Spacing Logic Explained:
One of the counterintuitive discoveries about growing agapanthus is that mild root congestion in established clumps actually stimulates more prolific flower stem production rather than competing against it. Spacing at forty-five to sixty centimetres allows clumps to develop and gradually fill toward each other over three to five years, creating the mild root-zone crowding that field observations consistently associate with peak flowering output. Extremely wide spacing — seventy-five centimetres or more — delays this productive crowding phase significantly and extends the wait for genuinely spectacular flowering. Many gardeners who space too widely spend years convinced their plants are underperforming when they are simply too isolated to trigger the biological flowering response that comes with appropriate root contact.
3. Container Depth Rules:
In containers, the same shallow crown-depth rule applies as in garden beds — and the same mild-crowding principle for triggering bloom also holds true. Choose a pot only marginally larger than the current root ball; agapanthus flowers most reliably in containers when the root system is lightly crowded rather than swimming in excess potting mix. The best container flowering consistently occurs from plants that are visibly pot-bound with roots approaching the drainage holes. Use a gritty, free-draining potting mix designed for Mediterranean or succulent plants, ensure the container has at least two substantial drainage holes, and position the container in full sun for at least six hours daily for reliable annual flowering without fail.
Watering Schedule for Successful Planting Agapanthus Plants Establishment:

Agapanthus is drought tolerant in its mature form but genuinely water-dependent during the first twelve to eighteen months after planting — and the transition between these two phases is gradual, requiring a responsive watering approach rather than the abrupt reduction in watering that causes unnecessary stress to still-establishing root systems.
1. First Season Schedule:
After planting agapanthus plants, water deeply once or twice a week during dry weather throughout the first growing season, checking soil moisture at a five-centimetre depth before each application. The goal is to keep the root ball evenly moist — never waterlogged, never completely dry — during this establishment phase. Consistent soil moisture in the first season encourages horizontal root extension into surrounding native soil, creating the deep, spreading root architecture that will support drought tolerance, disease resistance, and prolific flowering in all subsequent seasons.
2. Recognising Overwatering Damage:
The most common watering mistake in established agapanthus plantings is continuing summer watering rhythms through winter and spring, when cool temperatures and reduced sunlight dramatically lower the plant’s moisture consumption rate. Overwatered agapanthus shows yellowing of the outer leaves first, progressing inward — leaves that feel soft and slightly translucent rather than firm and leathery. At the crown base, persistent moisture contact causes the collar rot and crown rot fungi that produce the softening, browning, and foul smell that mark the advanced disease state requiring urgent intervention.
3. Drought Resilience Building:
From the second or third growing season, agapanthus planted in correct soil with appropriate drainage develops impressive natural drought tolerance — typically managing two to three weeks between watering events in summer without visible stress. This drought resilience stems from the plant’s evolved ability to store water and carbohydrates in its fleshy rhizomes, drawing on these reserves during dry periods rather than showing immediate stress response. Growing agapanthus in the right soil from the start — free-draining but moderately moisture-retentive — develops this resilience faster than planting in either waterlogged clay or excessively sandy substrate.
Fungal Diseases and Root Rot Affecting Planting Agapanthus Plants:
Disease management is the most neglected aspect of growing agapanthus in most gardening guides — but for planting agapanthus plants in Australian and New Zealand gardens specifically, understanding the key fungal diseases, bacterial infections, and microorganism-driven root problems is essential for protecting what can be a significant landscape investment.
1. Ink Disease Symptoms:
Ink disease caused by the fungal pathogen Mystrosporium adustum is the most visually distinctive disease of agapanthus, producing the characteristic black ink-like staining that discolors the outer leaf sheaths and rhizome surfaces of affected plants. Above-ground symptoms begin as progressive yellowing and browning of outer leaves, which might be dismissed as normal ageing until the plant is lifted and the unmistakable black staining on the basal tissue confirms the diagnosis. There is no fungicide that eliminates this pathogen once established — lift affected plants immediately, cut away all blackened tissue to clean white rhizome material, dust with sulfur powder, and replant in a fresh, well-drained location away from the contaminated soil area.
2. Phytophthora Root Rot:
Phytophthora root rot is caused by oomycete water molds that proliferate explosively in waterlogged, oxygen-depleted root zones — the exact conditions created by poor drainage or excessive winter watering of planting agapanthus plants in unsuitable sites. The above-ground symptom presentation is a paradox: the plant wilts and yellows despite moist soil, because root damage has impaired water uptake regardless of available moisture. Confirm root rot by lifting and examining roots directly — healthy agapanthus roots are pale cream and firm; Phytophthora-infected roots are brown to black, completely soft, and smell of decay, confirming active pathogen consumption of root tissue.
3. Crown Rot Prevention:
Crown rot in agapanthus is caused by Sclerotium rolfsii and Botrytis species that establish when the base of the plant is persistently damp — most commonly because mulch has been piled against the crown or because the soil surface around the planting does not drain freely after irrigation. Prevention is straightforward: maintain a five-centimetre clear gap between any mulch application and the plant’s crown, never mound soil against the base, and ensure that water does not pool around the plant for more than an hour after heavy rainfall or deep irrigation events in your planting agapanthus plants bed.
Diagnosing Yellow Leaves in Your Planting Agapanthus Plants Collection:
Leaf yellowing is the symptom that generates the most gardening forum questions about agapanthus, and it is frustrating precisely because it looks almost identical whether caused by overwatering, nutrient deficiency, pest attack, or disease — yet each cause requires a completely different corrective action to resolve. Understanding these warning signs is essential for successful planting agapanthus plants and maintaining healthy blooms throughout the growing season.
1. pH Chlorosis Signs
Interveinal chlorosis — where leaf veins remain green while the tissue between them fades to yellow — is almost always a pH-driven nutrient availability problem in agapanthus rather than a primary nutrient deficiency. In acidic soils below pH 6.0, iron and manganese become more freely available but can reach toxic concentrations; in alkaline soils above 7.5, these same elements become chemically bound and unavailable despite being physically present. Correcting soil pH to the 6.0–7.0 optimal range resolves interveinal yellowing in agapanthus more reliably than any targeted micronutrient supplementation program applied without first addressing the underlying chemistry. Soil balance plays a major role in healthy planting agapanthus plants and strong root development.
2. Overwatering Yellowing Pattern
Yellowing from chronic overwatering affects the oldest, outermost leaves of the agapanthus clump first and moves progressively inward, following the plant’s physiological response to impaired root function — sacrificing old tissue to preserve the central growing point. The leaf texture in overwatered plants is distinctly soft and slightly water-soaked near the base, differentiating it from the crisp, drying character of drought-related yellowing. Reducing watering frequency and improving drainage around any specimens showing this pattern, combined with light root zone aeration using a garden fork, often allows recovery before permanent crown damage occurs. Proper watering techniques are one of the most important parts of planting agapanthus plants successfully.
3. Bacterial Viral Symptoms
Mosaic virus symptoms — irregular mottled yellowing with no consistent location or progression through the canopy — appear occasionally in agapanthus, transmitted by aphid populations that build up on stressed or recently transplanted specimens. Bacterial soft rot producing a water-soaked, foul-smelling collapse of affected leaf bases can also be confused with crown rot but typically follows mechanical damage or insect feeding wounds rather than purely drainage-related pathways. Remove and destroy visibly infected tissue, apply neem oil to control aphid vectors, and replace severely affected plants with certified healthy divisions when rebuilding planting agapanthus plants beds.
Regular inspection, balanced watering, and healthy soil conditions all improve the long-term success of planting agapanthus plants in both garden beds and containers.
Fertilising and Ongoing Care After Planting Agapanthus Plants in Garden:
Fertilisation for agapanthus follows a seasonal logic that mirrors the plant’s own biological priorities across the year — and understanding that logic allows you to support each growth phase with exactly the right nutrient profile rather than applying a one-size-fits-all feed year-round.
1. Spring Balanced Feeding:
As agapanthus breaks dormancy in late winter and early spring, a single application of balanced slow-release granular fertiliser — an NPK ratio in the range of 10-6-4 or 9-5-5 — provides the phosphorus and potassium that support root development and flower stem initiation, along with the moderate nitrogen needed for healthy foliar growth. Apply this feed once, broadcast beneath the drip line, and water it thoroughly. Resist the temptation to reapply during summer — a single slow-release application provides fourteen to sixteen weeks of steady nutrient availability, which is all these plants require across the active growing season.
2. Division Timing Practice:
Established agapanthus clumps that have occupied the same position for five to seven years and whose flower stem count has visibly declined benefit from division in early to mid-autumn after the final flower spikes have been cut. Lift the entire clump with a garden fork, separate it into sections of three to five growing points using two forks back-to-back for leverage, and replant divisions at the same shallow crown depth that applies to all planting agapanthus plants operations. Fresh divisions take one full season to re-establish before returning to productive flowering.
3. Mulch Application Guide:
A light mulch layer of two to three centimetres applied beneath established agapanthus clumps each spring conserves soil moisture through summer, moderates root zone temperature during heat waves, and suppresses the weed competition that would otherwise compete with the shallow root system for water and nutrients. The single non-negotiable rule is maintaining a clear gap of five to eight centimetres between the inner edge of the mulch and the plant’s crown — this gap prevents the persistent moisture at the stem base that provides the entry conditions for Sclerotium and Botrytis crown rot infections.
Five Warning Signs Your Planting Agapanthus Plants Need Urgent Help:
These five symptoms each indicate a specific, addressable problem — and in every case, the sooner you respond, the more likely a complete recovery becomes without losing established plants that took years to develop into mature, productive clumps.
- Black rhizome staining confirms ink disease — lift, cut, treat, and relocate immediately.
- Plant-wide yellowing with moist soil signals active root rot below the soil surface.
- Crown base softening and odour reveals Sclerotium or Botrytis crown rot advancing rapidly.
- Zero flower stems despite lush foliage means shading, deep planting, or insufficient crowding.
- Outer leaves yellowing inward uniformly confirm chronic overwatering impeding root oxygen uptake.
Complete Step-by-Step Plan for Planting Agapanthus Plants This Season:
Use this installation sequence as a practical checklist — work through every step in order and you give each plant the strongest possible foundation for rapid establishment, abundant flowering, and long-term disease resistance throughout its life in your garden.
- Test soil pH and drainage six weeks before your planned planting date.
- Incorporate compost and pH amendments; allow four weeks before planting day.
- Set crown at or just below surface — no deeper than five centimetres maximum.
- Space plants forty-five to sixty centimetres apart for optimal long-term bloom density.
- Water deeply after planting; apply mulch to drip line with crown gap maintained.
Conclusion
Planting agapanthus plants well rewards you with one of the most spectacular and lowest-maintenance flowering perennials available in the Southern Hemisphere. Apply the site selection, depth, drainage, fertilisation, and disease prevention strategies from this guide and your plants will produce breathtaking blue and purple flower towers with increasing abundance for decades to come.
FAQ’s
Q1. What is the best season for planting agapanthus plants outdoors?
Early spring and early autumn both work well — mild soil temperatures support root establishment without heat or frost stress from either extreme.
Q2. How deep should the crown be when planting agapanthus plants?
Keep the crown at or just below the surface — no deeper than five centimetres, as deep planting reliably prevents flower stem production for multiple seasons.
Q3. Why do my agapanthus never flower despite healthy green foliage?
Non-flowering in agapanthus usually means insufficient sun exposure, too-deep crown burial, an oversized container, or not enough root crowding to trigger stem initiation naturally.
Q4. What causes yellow leaves after planting agapanthus plants in a bed?
Yellow leaves most often indicate pH-driven nutrient lockout, chronic overwatering with developing root rot, or early ink disease affecting the lower rhizome tissue at the base.
Q5. How much water do agapanthus need in the first year after planting?
Water deeply once or twice weekly during dry weather throughout the first season — always check soil moisture at five centimetres depth before each watering application.
Q6. What soil pH is ideal when planting agapanthus plants for best results?
A pH of 6.0–7.0 gives the best results — outside this range, nutrients become unavailable and yellowing, stunted roots, and poor establishment follow reliably.
Q7. How do I treat ink disease in planting agapanthus plants that are affected?
Lift affected clumps immediately, cut all blackened tissue to clean white material, dust with sulfur, and replant in a fresh well-drained position away from contaminated soil.
Q8. When is the right time to divide planting agapanthus plants that are overcrowded?
Divide in early to mid-autumn every five to seven years — only when flower stem count has visibly declined, as mild crowding significantly improves bloom production.
Q9. Does planting agapanthus plants in containers work as well as in-ground?
Yes — container specimens bloom beautifully when slightly pot-bound, using free-draining mix, full sun, and the same shallow crown-depth rule as any garden bed installation.
Summary
Planting agapanthus plants successfully comes down to a handful of specific requirements — adequate direct sun, free-draining soil at the right pH, shallow crown depth, and ongoing protection from the fungal diseases, root rot microorganisms, and bacterial infections that affect stressed specimens. The nine strategies in this guide give every planting agapanthus plant project the technical foundation for reliable establishment and increasingly spectacular bloom.
Follow the soil preparation, watering, fertilisation, and disease management advice throughout this article and your investment will produce extraordinary flowering for many years ahead. Every successful bed of agapanthus starts with the preparation decisions made before the first rhizome goes into the ground.