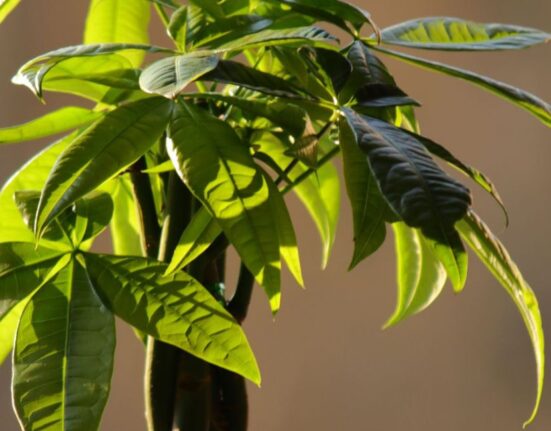
The first time I tried growing an indigo plant in my herb garden, I treated it like a regular annual herb — watered it on a fixed schedule, ignored soil drainage entirely, and tucked it into a partially shaded bed because I worried about summer heat. Within six weeks, the lower leaves had turned yellow, a gray mold had colonized the stems at the soil line, and what should have been a lush blue-dye producer was a thin, collapsing skeleton of its potential.
My second attempt, built on genuine research, produced a healthy, multi-stemmed indigo plant that yielded three harvests of dye-quality leaves across a single growing season.The indigo soil requirements — primarily Indigofera tinctoria, though the genus encompasses over seven hundred species across tropical and subtropical regions — has captivated human civilization for millennia as the primary source of one of history’s most prized natural dyes..
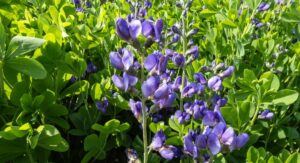
Grow a thriving indigo plant with proper knowledge and unlock botanical tradition, vibrant color, and extraordinary backyard garden beauty naturally.
Indigo Plant Origins Reveal Its Specific Growing Environment Needs:
Every successful indigo plant cultivation project begins with understanding the ecological context in which this species evolved — because the environmental conditions it encountered across thousands of generations of natural selection in the tropical and subtropical regions of Asia, Africa, and Central America are precisely the conditions it requires to thrive, bloom prolifically, and produce the high-indigotin leaf concentrations that make it valuable as a dye crop.
The indigo soil requirements is native to warm, seasonally dry environments with well-drained, relatively poor soils — as a legume, it evolved the remarkable ability to fix atmospheric nitrogen through its root nodule partnership with Rhizobium bacteria, reducing its dependence on soil nitrogen in exchange for other minerals it can access in the mineral-rich but organically lean soils it naturally colonizes across its native range.
The indigo soil requirements require long, warm growing seasons with temperatures consistently above sixty-five degrees Fahrenheit to complete its full growth and reproductive cycle. In its native tropical habitat, day length remains relatively consistent year-round, temperatures stay warm, and seasonal rainfall alternates with dry periods that push the plant’s roots deep in search of water — building the extensive root system that makes the indigo soil requirements surprisingly drought-tolerant once established in well-prepared garden conditions.
Replicating these conditions in temperate gardens — warm soil, full sun, excellent drainage, minimal nitrogen fertilization, and consistent but not excessive moisture — creates the environment in which the indigo soil requirements expresses its full genetic potential for foliar dye production, ornamental flowering, and soil improvement through biological nitrogen fixation that benefits every subsequent crop planted in the same garden bed.
Indigo Plant Care Essential Growing Reference Table:
Use this at-a-glance reference table to keep all critical indigo plant care requirements organized and immediately accessible throughout every stage of the growing season from germination through harvest and overwintering.
| Care Factor | Ideal Requirement | Symptom When Wrong | Corrective Action |
| Sunlight | Full sun, 8+ hours daily | Leggy stems, pale leaves, low dye yield | Relocate to south-facing open position |
| Soil type | Sandy loam, slightly acidic pH 5.5–7.0 | Yellow leaves, slow growth, root rot | Amend with sand, test and adjust pH |
| Drainage | Excellent, never waterlogged | Root rot, stem base collapse | Raise bed, add grit layer at base |
| Watering | Moderate, drought-tolerant once established | Wilting, yellow leaves, fungal crown | Deep weekly irrigation, never daily |
| Fertilizer | Low nitrogen; phosphorus and potassium focus | Excessive leaf growth, low indigotin | Withhold nitrogen; use bloom fertilizer |
| Temperature | 65–95°F active growth season | Stunting, leaf drop below 50°F | Start indoors; protect from cold snaps |
| Spacing | 18–24 inches between plants | Fungal spread, poor air circulation | Thin seedlings early; prune inward growth |
| Soil microbes | Rhizobium inoculant applied at planting | Pale growth, no root nodules visible | Inoculate seed with legume inoculant |
| Harvest timing | Pre-flower, when leaves are largest | Reduced indigotin levels post-flowering | Harvest at bud stage before blooms open |
| Overwintering | Container indoors or mulched deeply | Frost kill of crown and roots | Pot up in autumn; keep frost-free at 50°F |
Indigo Plant Soil and Site Preparation Builds Healthy Root Systems:

Soil preparation for the indigo plant requires a different mindset than most garden crops — this leguminous species performs best in lean, well-drained conditions that stimulate its nitrogen-fixing root nodule development rather than suppressing it through nitrogen saturation from over-amended soils.
Prepare your growing site by testing soil pH, ensuring the result falls between 5.5 and 7.0, and incorporating coarse grit or perlite if your native soil tends toward clay or compaction that would impede the rapid drainage the indigo soil requirement requires to prevent the root rot and stem base fungal diseases that are its most common killers in garden cultivation.
1. Soil pH Importance:
Soil pH profoundly affects the indigo plant’s ability to access micronutrients and to establish the Rhizobium root nodule partnership that supplies its nitrogen needs. Outside the 5.5–7.0 range, iron and manganese become chemically unavailable, causing interveinal chlorosis — the distinctive yellow leaf pattern with green veins that signals micronutrient lockout rather than pathogen infection.
Test pH before every new indigo soil requirements planting cycle; adjust with sulfur to lower or agricultural lime to raise the pH to the correct range that maximizes biological availability of all essential minerals required by this historically significant and botanically fascinating dye plant throughout its active growing season.
2. Drainage Layer Setup:
Installing a two-inch coarse grit layer beneath the root zone before planting any indigo soil requirements creates a critical transition zone that prevents water from accumulating around the root crown during rainfall or irrigation events. Standing water around an indigo soil requirements crown depletes oxygen from root pores within hours, creating the anaerobic conditions that Pythium and Phytophthora root rot pathogens exploit to colonize root tissue rapidly.
These microorganism-related diseases produce yellowing foliage, wilting despite moist soil, and a darkened, mushy root crown that signals systemic infection that is extremely difficult to reverse once the rot pathogen has penetrated beyond the outer feeder root system.
3. Rhizobium Inoculation Process:
Treating indigo soil requirements seeds with a legume-specific Rhizobium inoculant before sowing establishes the critical nitrogen-fixing partnership that this genus evolved to exploit. Without inoculation in sterile or Rhizobium-deficient soils, the indigo soil requirements must obtain all its nitrogen from soil reserves — leading to slower growth, paler leaf coloration, and reduced indigotin production compared to properly inoculated plants. Moisten seeds lightly, coat with granular inoculant, and plant immediately to maintain viability of the beneficial bacteria that will colonize root tissue and begin fixing atmospheric nitrogen into plant-available forms within three to four weeks of successful establishment in warm, moist soil conditions.
Indigo Plant Disease Identification Saves Your Harvest Reliably:
Disease pressure on the indigo plant comes from multiple pathogenic sources across the growing season, and early, accurate identification determines whether management succeeds in time to save the harvest or whether the infection spreads beyond recovery. Fungal, bacterial, and viral threats all present with distinct visual symptom patterns that experienced growers learn to distinguish quickly and treat with appropriate targeted interventions.
1. Fungal Infection Signs:
Fungal diseases represent the most common disease threat to the indigo soil requirements in humid growing conditions. Cercospora indigoferae produces small, circular brown leaf spots with yellow halos that coalesce into large necrotic patches as infection progresses through the leaf canopy. Botrytis cinerea — gray mold — attacks stem tissue at the soil line during cool, wet weather, causing the characteristic gray fuzzy lesion that rapidly collapses young indigo plant stems.
Apply copper-based fungicide at first symptom appearance, remove all infected tissue, improve air circulation by thinning overcrowded plantings, and reduce overhead irrigation that keeps foliage wet and creates ideal fungal spore germination conditions throughout susceptible periods of the growing season.
2. Bacterial Leaf Spot:
Bacterial leaf spot on the indigo soil requirements — primarily caused by Xanthomonas species — presents as water-soaked, angular lesions on leaves that are bounded by leaf veins and quickly turn brown with yellow surrounding halos as infected tissue dies and desiccates. The pathogen enters through stomata and natural leaf openings, spreading rapidly through the canopy during rainy periods when splashing water moves bacterial inoculum between adjacent leaves and plants.
Remove all infected leaves from any indigo soil requirements showing symptoms immediately, avoid wetting foliage during irrigation, and apply copper hydroxide as a preventive spray during periods of high rainfall that create conditions favorable for bacterial disease development and rapid spread throughout closely planted garden populations.
3. Viral Disease Symptoms:
Mosaic virus infections — transmitted by aphids and whiteflies that pierce leaf tissue and inject viral particles directly into the vascular system — cause distinctive irregular yellow mottling and distorted, cupped new leaf emergence on infected indigo soil requirements specimens. Unlike fungal and bacterial diseases, viral infections have no curative treatment — the virus replicates in every cell and persists permanently.
Immediately isolate any indigo soil requirements displaying mosaic patterns, eliminate all sap-feeding pest insects from your growing area with insecticidal soap or neem oil, and remove severely infected plants entirely to prevent insect-mediated viral spread to healthy neighboring specimens in your indigo soil requirements collection through the entire growing season.
Indigo Plant Yellow Leaves Diagnose Specific Correctable Problems:
Yellow leaves on an indigo plant are among the most common concerns raised by growers, but the yellowing pattern, distribution across the plant, and accompanying symptoms all point toward specific, identifiable causes — each requiring a different targeted response rather than the non-specific interventions that most growers instinctively reach for when they first notice foliage color changes developing on their plants.
1. Root Rot Yellowing:
When yellow leaves on an indigo plant appear alongside stem softness at the soil line, wilting despite adequately moist soil, and a foul odor from the growing medium, root rot from Pythium or Phytophthora pathogens is the cause.
Unpot or excavate roots, confirm brown mushy tissue diagnosis, remove all infected material with sterilized scissors, dust cut surfaces with powdered sulfur as a natural antimicrobial, and replant into completely fresh, fast-draining soil mix. The recovered indigo soil requirement will regenerate new roots rapidly in warm soil conditions if root rot is caught and treated before the infection penetrates the main crown and stem base beyond the remediation threshold.
2. Nitrogen Excess Symptoms:
Paradoxically, over-fertilization with nitrogen-rich amendments causes yellow leaf symptoms in the indigo soil requirements by disrupting the internal nutrient balance — excessive nitrogen stimulates rapid, lush vegetative growth that depletes other essential minerals faster than the root system can replace them, producing a secondary deficiency that manifests as interveinal yellowing on the newest leaves emerging at the growing tips.
As a nitrogen-fixing legume, the indigo soil requirements requires minimal supplemental nitrogen — focus fertilization on phosphorus and potassium to support flowering, root development, and overall metabolic efficiency without triggering the nitrogen excess that reduces both foliage quality and the indigotin concentration that defines a productive harvest from your indigo cultivation efforts.
3. Natural Leaf Drop:
Not every instance of yellowing and leaf loss on an indigo plant signals a disease or care problem — natural senescence causes gradual yellowing and shedding of the oldest lowest leaves as the plant channels energy resources toward active upper growth and flowering. This normal cycle progresses slowly, affects one or two leaves at a time, and causes no wilting, stem discoloration, or soil odor.
Simply remove yellowed leaves cleanly at the petiole base using sterilized scissors to maintain good airflow and hygiene around the base of the indigo soil requirements, preventing fallen senescent leaves from creating the moist, decomposing debris that fungal pathogens exploit as entry points and food sources for establishing infections in healthy stem tissue nearby.
Indigo Plant Common Pests Weaken Immunity and Spread Disease:
Pest management on the indigo plant is inseparable from disease management — most of the viruses and bacterial diseases that threaten this species are transmitted directly by sap-feeding insects whose populations explode on plants weakened by poor growing conditions, making pest prevention and environmental optimization mutually reinforcing strategies for any serious indigo soil requirements cultivation program.
- Aphids cluster on indigo soil requirements, growing tips, transmitting mosaic viruses and secreting honeydew that promotes sooty mold.
- Whiteflies cloud around indigo soil requirements foliage when disturbed, spreading viral disease between plants through contaminated feeding stylets.
- Spider mites thrive in hot, dry conditions, creating fine webbing and stippled yellow patches on indigo soil requirements leaf surfaces.
- Leafhoppers feed on indigo soil requirements vascular tissue, injecting bacterial pathogens that cause systemic leaf scorch and wilting symptoms.
- Root-knot nematodes invade indigo soil requirements
- feeder roots, creating galls that block nutrient uptake and mimic nutrient deficiency symptoms above ground.
Indigo Plant Harvesting Techniques Preserve Maximum Dye Quality:
The harvest timing and method for any indigo plant dye crop are as important as every care decision that preceded them — indigotin concentration in the leaves peaks just before the first flower buds open and declines measurably once the plant shifts its metabolic resources toward reproductive growth. Harvesting at the correct phenological moment, using clean technique that minimizes plant stress, and processing leaves promptly after cutting determines whether your indigo soil requirements delivers the deep, saturated blue color that makes this species historically irreplaceable or a pale, disappointing result that reflects poor harvest timing rather than poor cultivation practice throughout the growing season that preceded it.
- Harvesting indigo soil requirements leaves in the morning after dew dries but before midday heat reduces indigotin concentration in foliage.
- Cut indigo soil requirements stems to within six inches of the ground to stimulate vigorous regrowth for subsequent harvest cycles.
- Process freshly harvested indigo soil requirements leaves within four hours to prevent enzymatic breakdown of indigotin precursors rapidly.
- Sterilize all harvest tools with isopropyl alcohol between plants to prevent cross-contaminating bacterial pathogen introduction between specimens.
- Leave at least thirty percent of indigo soil requirements foliage intact after each harvest to maintain photosynthetic capacity for recovery.
Indigo Plant Propagation Methods for Expanding Your Collection:
Understanding the most reliable propagation methods for the indigo plant allows you to expand your planting, replace aging specimens, share surplus plants with other dye gardeners, and ensure you always have vigorous, disease-free stock ready for each new growing season without depending entirely on purchased seed supplies that may carry disease or have uncertain germination history and viability.
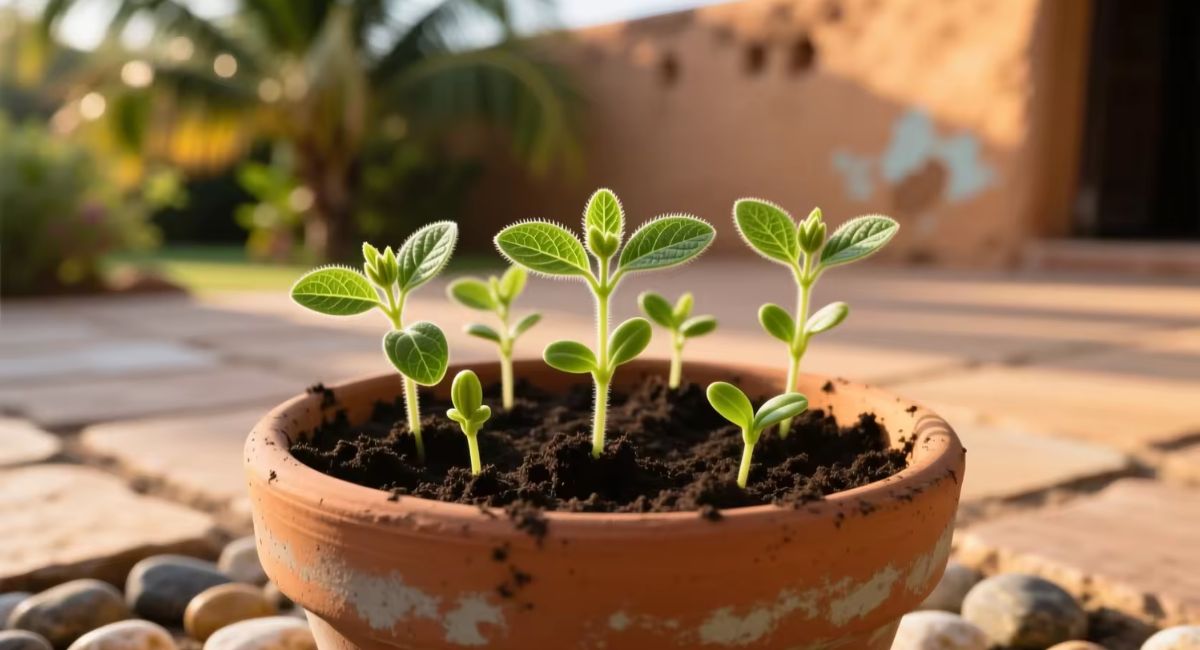
1. Seed Scarification Technique:
Indigo plant seeds have a hard, water-resistant seed coat that inhibits germination unless physically or chemically scarified before sowing. Lightly nick the seed coat with a nail file on the side opposite the hilum, then soak in warm water for twelve hours before sowing in a warm, moist seed-starting mix maintained at seventy-five to eighty-five degrees Fahrenheit.
Properly scarified and inoculated indigo soil requirement seeds germinate within seven to fourteen days, producing vigorous seedlings that establish rapidly when transplanted into well-prepared outdoor beds after all frost risk has passed and soil temperatures have stabilized above sixty-five degrees Fahrenheit consistently throughout the day and night hours.
2. Softwood Cutting Propagation:
Take four-to-six-inch softwood cuttings from actively growing indigo soil requirements shoot tips in late spring or early summer, removing lower leaves and dipping the cut end in rooting hormone powder before inserting into a fifty-fifty perlite and peat moss blend. Maintain cuttings in a high-humidity environment at seventy-five degrees Fahrenheit with bright indirect light until roots develop within three to five weeks.
Cuttings propagated from healthy parent plants preserve the genetic characteristics of superior-performing indigo soil requirements specimens — particularly important when you have identified plants with exceptional indigotin concentration or disease resistance worth perpetuating across multiple growing seasons in your dedicated dye garden cultivation program.
3. Root Division Method:
Established indigo soil requirements specimens grown in frost-free climates develop multi-stemmed shrubby forms that can be divided in early spring before new growth emerges. Use a sterilized spade to divide the root mass into sections, each retaining at least three healthy stems and a substantial root portion. Dust all cut root surfaces with powdered cinnamon or sulfur as a natural antimicrobial barrier before replanting into prepared beds with excellent drainage.
Divisions from vigorous parent plants establish faster than seedlings, skipping the vulnerable early germination and juvenile stages where the indigo soil requirementsis most susceptible to damping-off diseases caused by soil-dwelling Pythium and Fusarium pathogens in warm, moist nursery conditions that favor these microorganism-related threats to young plant tissue.
Indigo Plant Overwintering and Long-Term Perennial Care:
In frost-free climates where temperatures remain above forty degrees Fahrenheit year-round, the indigo plant grows as a perennial shrub that becomes increasingly productive with age as its root system expands and its nitrogen-fixing capacity develops. In temperate zones where killing frosts occur, growers must choose between treating the indigo soil requirements as a tender annual, overwintering rooted cuttings indoors, or containerizing mature specimens for frost-protected winter storage that allows the same genetic material to resume growth the following spring without the delays inherent in starting from seed each season.
1. Container Overwintering:
Pot up your indigo plant into terracotta containers in late summer before the first autumn frost arrives — this gives roots time to adjust to container conditions while outdoor temperatures remain warm enough to support continued metabolic activity before the plant enters its slower winter period.
Move containerized indigo soil requirements specimens into a frost-free greenhouse, conservatory, or cool indoor space maintaining temperatures between forty-five and fifty-five degrees Fahrenheit, reduce watering to monthly applications, and withhold fertilizer entirely from November through February to prevent the soft, disease-prone growth that warm temperatures combined with winter fertilization stimulates in overwintering tropical specimens kept in low-light indoor conditions.
2. Mulching Root Zone:
In mild maritime climates where frosts are occasional and brief rather than sustained and deep, mulching the root zone of an established indigo soil requirement with a six-inch layer of straw, bark chip, or compost provides sufficient thermal insulation to protect the crown through short cold spells.
Apply mulch after the first light frost when the soil has begun to cool but before any hard freeze arrives, pulling it back away from the stem base by two inches to prevent the moist bark conditions that fungal collar rot pathogens exploit when mulch contacts stem tissue directly during the cold, wet winter months when the indigo soil requirements lacks the metabolic vigor to defend against pathogen attacks at its most vulnerable base.
3. Spring Revival Approach:
When your overwintered indigo soil requirements begin showing the first signs of new bud break in spring — tiny bright green growth points emerging from stem nodes — gradually reintroduce it to outdoor conditions over two weeks through progressive exposure.
Begin fertilization only after two to three new leaf pairs have fully expanded, starting with half-strength phosphorus-focused feed that supports root development rather than triggering the rapid nitrogen-driven vegetative growth that creates the lush but pest-susceptible, disease-prone foliage that attracts aphids and sets the stage for the viral and bacterial disease cycles that can devastate an otherwise healthy and productive indigo soil requirements collection early in the growing season before beneficial insect populations establish sufficient numbers to provide natural pest suppression across your dye garden.
Conclusion
Growing a productive, healthy indigo plant rewards every effort with extraordinary botanical heritage, living natural dye, and genuine ecological contribution through nitrogen fixation. Prevent root rot through excellent drainage, address fungal infections early, monitor for bacterial disease and viral threats consistently, and diagnose yellow leaves with precision rather than guesswork. A well-tended indigo soil requirement delivers harvests of legendary blue-dye quality and a profound connection to botanical history that no synthetic colorant can ever replicate in the modern natural dye garden.
FAQ’s
Q1. Why are the leaves on my indigo plant turning yellow rapidly?
Yellow leaves on an indigo plant typically indicate overwatering, root rot, pH imbalance, or nitrogen excess requiring immediate targeted correction.
Q2. How much sun does an indigo plant need to thrive?
An indigo plant requires a minimum of eight full hours of direct sunlight daily to produce high-quality dye-bearing foliage consistently.
Q3. What causes root rot in an indigo plant most commonly?
Root rot in an indigo plant is almost always caused by overwatering in poorly drained soil that favors Pythium and Phytophthora pathogens.
Q4. Can I grow an indigo plant in a container successfully?
Yes — an indigo plant grows well in large terracotta containers with excellent drainage holes and a lean, sandy growing medium.
Q5. When is the best time to harvest an indigo plant for dye?
Harvest your indigo plant just before the first flower buds open — this is when leaf indigotin concentration reaches its absolute peak.
Q6. How do I treat fungal disease on my indigo plant leaves?
Treat fungal disease on an indigo plant by removing infected leaves, applying copper fungicide, and improving air circulation around plantings.
Q7. Does an indigo plant need nitrogen fertilizer to grow well?
No — the indigo plant fixes its own nitrogen through root nodule bacteria and needs only phosphorus and potassium supplementation.
Q8. Can an indigo plant survive frost and cold winter temperatures?
The indigo plant is frost-sensitive; overwinter it in containers indoors or mulch deeply in mild climates to protect the crown.
Q9. How do I propagate an indigo plant from cuttings at home?
Root indigo plant softwood cuttings in perlite and peat moss at seventy-five degrees with high humidity until roots develop within five weeks.
Summary
The indigo plant is one of humanity’s most storied botanical companions — a nitrogen-fixing legume, a natural dye source of extraordinary historical significance, and a genuinely beautiful ornamental that rewards knowledgeable, attentive cultivation with remarkable productivity and resilience across a long growing season. Mastering its requirements — full sun, well-drained lean soil, minimal nitrogen, correct pH, and consistent but moderate moisture — creates the conditions for the indigo soil requirements to express its full genetic potential for indigotin production, ornamental flowering, and soil health contribution through biological nitrogen fixation.
Diagnose yellow leaves accurately, prevent root rot through disciplined drainage management, monitor for fungal infections, bacterial leaf spot, and viral mosaic disease vigilantly, and manage pest populations before they transmit disease between plants. Every investment in understanding the indigo soil requirements deeply returns dividends measured in extraordinary natural color, healthier soil, and a living connection to the rich, cross-cultural heritage of botanical dye tradition that this remarkable indigo plant has embodied across the entirety of recorded human history.