The first time I tried planting a jasmine, I buried it against a shaded north-facing fence, watered it every single day because I was convinced the summer heat would dry it out, and waited for the fragrant explosion I’d seen on every gardening programme. What I got instead was a yellowing vine that dropped leaves through August and refused to flower at all. The soil was waterlogged, the position was wrong, and the combination of overwatering and poor air circulation had created exactly the conditions that fungal root diseases thrive in. The jasmine wasn’t dead, but it certainly wasn’t happy.
Whether you’re growing common jasmine (Jasminum officinale), star jasmine, winter jasmine, or one of the tender tropical species, the principles behind successful planting a jasmine are more consistent across the genus than most gardeners expect — sunlight, drainage, support structure, and the disease awareness that keeps a new plant from struggling in its first two critical seasons.
Planting a Jasmine in the right spot with properly prepared soil ninety percent of the work — then it grows itself.
Planting a Jasmine Choosing the Right Site Determines Everything:
Site selection is the single most impactful decision you make when planting a jasmine, and unlike most subsequent care decisions, it’s almost impossible to correct after the fact without lifting the plant entirely and starting again. Jasmine species vary in their exact requirements, but the core preference across the genus is consistent — warmth, shelter from cold drying winds, and enough sunlight to drive the flowering that jasmine is grown for in the first place.
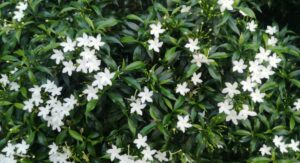
A warm south or west-facing wall, fence, or pergola in the Northern Hemisphere provides the solar radiation and reflected warmth that promotes the prolific blooming most people picture when they imagine Jasmine Planting Guide In shade or under cold exposure, jasmine produces abundant foliage at the expense of flowers, grows slowly, and develops the chronically stressed low-vigor state that makes it disproportionately vulnerable to the fungal diseases, bacterial infections, and the root rot organisms that opportunistically colonize plants that aren’t thriving in their chosen position.
Beyond orientation, consider what the site does with water. Jasmine planted against walls or under roof overhangs can suffer from rain shadow — areas where rainfall never reaches because the structure overhead intercepts it — creating drought stress even in wet climates that tricks gardeners into underwatering when the plant actually needs supplemental irrigation at the root zone despite the wet weather surrounding it.
Equally problematic is the opposite: low-lying sites where water pools after rain, creating the saturated soil conditions that invite Phytophthora and Pythium root rot pathogens to establish in the root zone of a newly planted jasmine before the plant has had any opportunity to develop the robust root system that gives it any chance of fighting back. When planting a jasmine, observe how water behaves at the candidate site across a few rainfall events before committing — the thirty minutes of observation is worth far more than any amount of subsequent corrective care applied to a badly-sited plant struggling in the wrong microclimate.
Planting a Jasmine Complete Step-by-Step Reference Table:
Keep this reference close when you’re actually in the garden — it covers every key variable in planting a jasmine with the specific details that determine whether the plant establishes successfully or spends its first season fighting against conditions it was never going to thrive in.
| Step / Factor | Ideal Specification | Common Mistake | Consequence |
| Site orientation | South or west-facing wall | North-facing shaded position | No flowers, weak growth |
| Soil drainage | Well-draining, moist loam | Heavy clay, poor drainage | Root rot, Phytophthora infection |
| Soil pH | 6.0–7.5 slightly acidic to neutral | Too acidic or too alkaline | Yellow leaves, nutrient lockout |
| Planting depth | Crown at soil level, not buried | Burying the graft union | Crown rot, bacterial infection |
| Hole size | 2x width of root ball | Hole same size as pot | Restricted root expansion |
| Support structure | Wires, trellis, or frame ready | No support at planting time | Wind damage, broken stems |
| Planting time | Spring or early autumn | Midsummer or mid-winter | Transplant stress, root failure |
| Initial watering | Deep thorough soak at planting | Light surface watering only | Shallow roots, drought stress |
| Mulching | 3-inch organic mulch, trunk gap | Mulch against the stem base | Crown rot, fungal stem disease |
| Fertiliser timing | 6 weeks after planting | Fertilise at planting time | Root burn, transplant shock |
Planting a Jasmine Soil Preparation That Sets Up Long-Term Success:

Soil preparation before planting a jasmine is the step that most gardeners either skip entirely or do half-heartedly, and it has more bearing on the plant’s long-term health than almost anything that follows in subsequent seasons. Jasmine prefers a moderately fertile, well-draining soil with a pH between 6.0 and 7.5 — slightly acidic to neutral — that holds enough moisture to support continuous growth without ever becoming waterlogged at the root zone.
The combination of adequate drainage and reasonable moisture retention sounds contradictory but is achievable with the right soil structure, and getting it right creates the root environment that jasmine needs to establish quickly, develop the root mass required for prolific flowering, and resist the soil-borne pathogenic microorganisms that exploit poorly drained or nutrient-imbalanced growing conditions.
1. Improving heavy clay:
Clay soil is the most common challenge when planting a jasmine in temperate gardens. Clay holds water beautifully — often too beautifully for a plant that needs some degree of drying between waterings. Incorporating coarse horticultural grit at a ratio of one part grit to three parts existing clay through the planting area to a depth of forty centimetres dramatically improves drainage, reducing the waterlogged conditions that favour Pythium and Phytophthora root rot pathogens. Add well-rotted garden compost at the same time to improve soil structure and the beneficial microorganism populations that naturally suppress pathogenic fungi in healthy, biologically active soil surrounding healthy root systems.
2. Sandy soil amendments:
Sandy soil presents the opposite challenge for planting a jasmine — it drains so quickly that moisture and nutrients wash through before the root system can access them, creating the chronic low-level drought stress and nutrient deficiency that causes yellowing of lower leaves, reduced flower production, and weakened plant immunity that makes jasmine disproportionately attractive to the aphids and other sap-feeders that transmit viral diseases between susceptible plants. Incorporate generous quantities of well-rotted compost, leaf mould, or aged manure into sandy soil before planting to improve water and nutrient retention without compromising the drainage that prevents root disease from establishing.
3. pH testing and adjustment:
Testing and adjusting soil pH before Jasmine Planting Guide is a simple step that prevents the nutrient lockout problems that cause chronic yellowing and poor growth in plants sited in soil outside their optimal pH range. At pH above 7.5, iron and manganese become chemically unavailable — producing the interveinal chlorosis where leaf tissue between veins fades to yellow while veins themselves stay green, a visually distinctive symptom that confirms pH-related nutrient deficiency rather than disease or overwatering as the underlying cause. Apply sulfur to lower pH or garden lime to raise it, allow four to six weeks for the adjustment to take effect, and retest before proceeding with planting to confirm the correction has reached the target range.
Planting a Jasmine Timing and Technique for Best Establishment:
When you plant matters almost as much as where you plant for a successful jasmine establishment. Spring is the optimal season in most temperate climates — rising soil temperatures accelerate root growth, lengthening days support vigorous photosynthesis, and the entire growing season stretches ahead for the plant to establish before facing its first winter. Early autumn works well too, giving roots time to establish in still-warm soil before winter dormancy, and reducing the transplant-period irrigation burden because cooler temperatures mean lower evaporative demand on a root system that hasn’t yet developed the capacity to replace moisture losses rapidly.
1. Planting hole preparation:
Dig a hole at least twice the width of the root ball but only as deep — burying the crown or graft union of a jasmine below soil level creates the moist, bark-enclosed microenvironment where fungal crown rot pathogens and bacterial stem diseases establish rapidly and spread downward into the root system. The wider hole matters because it loosens the surrounding soil, allowing lateral root expansion that anchors the plant and builds the foraging network the jasmine needs to develop independently of supplemental watering within its first full growing season after successfully planting a jasmine establishment in a well-prepared garden position.
2. Root ball handling:
Remove the pot carefully and inspect the root ball before lowering it into the prepared hole when planting a jasmine. Tightly circling roots should be gently teased outward — roots left curling in their pot shape continue growing in circles rather than exploring outward, eventually girdling the stem and causing mysterious decline years later that’s difficult to attribute correctly. Check for any brown, soft, or foul-smelling root sections that indicate pre-existing root rot from the nursery or garden centre — trim these cleanly with sterilized scissors before planting, treating cut surfaces with powdered cinnamon as a natural antifungal barrier before installing the plant in its prepared ground position.
3. Support installation timing:
Install all support structures — wall wires, trellis panels, bamboo canes, or pergola attachment points — before or at the time of Jasmine Planting Guide rather than afterward. Digging post holes or hammering wall fixings after planting inevitably disturbs the root ball and damages the young feeder roots that represent the plant’s entire capacity for water and nutrient uptake in its first vulnerable weeks after transplanting. Tie in new jasmine growth loosely to the support structure from the outset, guiding the main stems in the direction you want the framework to develop before secondary growth makes directional training significantly more difficult to achieve without breaking woody stems.
Planting a Jasmine Disease Prevention Starts at Planting Time:
The disease prevention strategy for planting a jasmine begins before the plant goes into the ground — site selection, soil preparation, planting depth, and mulching techniques all have direct implications for disease pressure in the months and years after installation. Understanding the main diseases that affect jasmine gives you the diagnostic tools to recognize problems early and the preventive knowledge to avoid creating the conditions that allow them to establish in the first place, which is always more effective than treating established infections in a plant that is already struggling to maintain its health under disease pressure.
- Jasmine wilt caused by Fusarium oxysporum produces sudden wilting and yellowing that progresses from one stem outward through the whole plant rapidly.
- Phytophthora root rot thrives in waterlogged soil around jasmine crowns, causing yellowing, collapse, and a foul smell from the root zone below.
- Botrytis grey mould colonises damaged jasmine tissue in cool humid conditions, spreading grey fuzzy growth across stems and foliage if airflow is restricted.
- Bacterial leaf scorch from Xanthomonas produces brown water-soaked lesions on jasmine leaves that spread inward from leaf margins under wet conditions.
- Cucumber mosaic virus, transmitted by aphids feeding on jasmine vascular tissue, causes mottled yellow-green leaf discoloration and distorted new growth throughout.
Planting a Jasmine Watering and Feeding in the First Full Season:
The care you provide in the first season after planting a jasmine determines whether the plant develops the root system and structural framework that supports decades of vigorous flowering, or whether it struggles through establishment into a permanently compromised specimen that never quite delivers the performance it was capable of achieving in better-managed conditions. Watering discipline in the first season is particularly important — jasmine needs consistent moisture to support root development and new growth, but not the sustained saturation that promotes the root rot diseases that strike hardest when root systems are young, small, and unable to recover from significant pathogen damage before the damage becomes irreversible.
- Water deeply once or twice weekly in the first season rather than light daily irrigation that encourages shallow surface roots throughout.
- Check soil moisture at root depth before watering — the finger test to two inches prevents the overwatering that causes root rot in newly planted jasmine.
- Apply a balanced slow-release fertiliser six weeks after planting when roots have established enough to absorb nutrients without transplant burn risk.
- Avoid high-nitrogen fertilisers that drive excessive vegetative growth at the expense of the flower bud development that makes planting a jasmine worthwhile.
- Apply a three-inch organic mulch layer around the planting area keeping a clear gap of at least two inches from the main stem base always.
Planting a Jasmine Training and Pruning for Maximum Flower Production:
Training and pruning decisions made in the first two seasons after planting a jasmine establish the structural framework that determines flowering performance for the entire lifetime of the plant. Jasmine flowers on growth from the previous season — which means pruning at the wrong time removes the very stems that would have produced the next season’s flowers, producing a well-shaped but non-flowering vine that disappoints every summer without the gardener understanding why the pruning that seemed sensible at the time had such a detrimental impact on the display they were trying to improve through that intervention.
1. Initial stem training:
In the first year after planting a jasmine, focus entirely on training the main structural stems into the framework position rather than pruning for shape. Tie main stems horizontally or at an angle rather than vertically — horizontal training stimulates more lateral shoots from each main stem, dramatically increasing the total number of flowering side-shoots produced the following season. Vertical main stems produce flowering growth only at their tips, resulting in a plant that flowers at the top while the base becomes increasingly bare and woody without the density that makes jasmine visually impressive on a wall or fence panel.
2. Post-bloom pruning:
Prune planting a jasmine growth immediately after flowering finishes rather than at any other time of year — this timing removes spent growth while leaving the current season’s new shoots intact through the summer and autumn months during which they will mature into the flowering wood that produces next year’s blooms. Use sterilized, sharp secateurs and clean cuts just above a leaf node to prevent the stub dieback that creates the dead wood entry points where fungal canker pathogens and bacterial diseases enter the vascular system of otherwise healthy jasmine plants during the wet periods that follow post-bloom pruning in summer gardens.
3. Annual maintenance pruning:
Once established through three or four seasons since planting a jasmine, annual post-bloom maintenance pruning keeps the plant compact, well-structured, and flowering at maximum intensity rather than retreating into a dense tangle of old unproductive wood at the interior of the plant. Remove roughly one-third of the oldest, thickest stems annually to stimulate vigorous replacement growth from the base. This renewal approach maintains a continuous cycle of productive flowering wood and prevents the congestion at the plant’s center that reduces air circulation and creates the humid still-air microclimate where fungal diseases establish most readily in established jasmine over subsequent growing seasons.
Conclusion
Successful planting a jasmine comes down to getting the fundamentals right from the start — the right site, properly prepared soil, correct planting depth, and the disease-aware care that prevents root rot and fungal problems from undermining an otherwise well-chosen plant. Follow those principles consistently and jasmine becomes one of the most rewarding, fragrant, and long-lived climbers any garden can contain — filling warm summer evenings with the scent that justifies every hour of preparation invested before planting day.
FAQ’s
Q1. When is the best time for planting a jasmine in the garden?
The best time for planting a jasmine is spring or early autumn when soil is warm and growing conditions actively support rapid root establishment.
Q2. What soil does planting a jasmine actually require to thrive?
Successful planting a jasmine needs well-draining, moderately fertile soil with pH between 6.0 and 7.5 — heavy clay requires significant amendment before planting.
Q3. Why are the leaves yellowing after planting a jasmine recently?
Yellow leaves after planting a jasmine typically indicate overwatering causing root rot, poor drainage, or pH-related nutrient lockout requiring immediate investigation and correction.
Q4. How much sun does planting a jasmine position actually need?
For best flowering, planting a jasmine requires a south or west-facing position receiving at least six hours of direct sunlight throughout the main growing season.
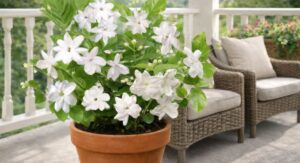
Q5. Can planting a jasmine succeed in a large container or pot?
Yes — planting a jasmine in a large container with a quality draining mix and a support structure works well, requiring more frequent watering than open ground specimens.
Q6. What fungal diseases most commonly affect jasmine after planting?
After planting a jasmine, Fusarium wilt, Botrytis grey mould, and Phytophthora root rot are the fungal diseases most likely to cause serious plant health problems.
Q7. How deep should the hole be when planting a jasmine correctly?
When planting a jasmine, dig the hole only as deep as the root ball — burying the crown promotes fungal crown rot and bacterial stem disease rapidly.
Q8. When should I prune jasmine after planting it in the garden?
Prune immediately after flowering finishes — this is the timing that leaves the following season’s flowering wood intact after planting a jasmine and establishing the framework.
Q9. How do I prevent root rot when planting a jasmine in wet soil?
Prevent root rot when planting a jasmine by incorporating coarse grit into the soil, raising the planting area, and watering deeply but infrequently from the start.
Summary
Everything about successfully planting a jasmine starts with the fundamentals — a warm sunny site, well-draining soil amended to the right pH, correct planting depth, and a support structure installed before the plant goes in rather than after. The diseases that most commonly undermine jasmine — Phytophthora root rot, Fusarium wilt, Botrytis grey mould, and viral mosaic from aphid transmission — all establish most easily in poorly drained, inadequately aerated, or chronically stressed growing conditions that proper site preparation and disciplined first-season care prevent entirely. Yellow leaves, wilting despite moist soil, and grey mould on foliage are the early warning signs worth responding to quickly rather than watching worsen over weeks.
Train main stems horizontally from the outset, prune after bloom rather than before, and avoid the high-nitrogen feeding that delays flowering in exchange for excessive foliage. Get those things right when planting a jasmine and the plant rewards every hour of careful preparation with decades of spectacular fragrant blooms that transform any garden wall, fence, or pergola into one of the most beautiful and sensory features any outdoor space can possess through the long warm months of summer and early autumn.