My first attempt at green velvet boxwood planting ended with three dead shrubs in the span of a single summer — I set them into heavy, poorly drained clay soil, gave them no mulch, and watered them on a schedule that paid no attention to what the soil was actually doing between applications. By August, the roots were sitting in water after every rainstorm, and by September the boxwood blight had taken hold in the stressed root zone.
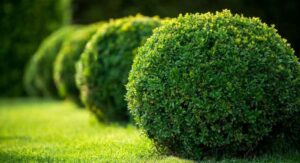
Green velvet boxwood planting is one of the most satisfying landscape investments a homeowner or gardener can make. Buxus ‘Green Velvet’ is a hybrid boxwood cultivar prized for its dense, rounded habit, rich emerald foliage that holds color through winter, and remarkable tolerance for shearing into formal shapes. It fits naturally into foundation plantings, low hedges, container displays, and formal knot gardens. But like all boxwood, ‘Green Velvet’ has specific soil, light, and drainage requirements that determine whether it establishes vigorously or languishes.
Follow these 9 expert tips for Green Velvet Boxwood Planting to grow dense, disease-resistant hedge that stays beautiful for decades.
Green Velvet Boxwood Planting Site Selection for Long-Term Establishment:
Where you place your boxwood matters more than almost any other decision in this process — a well-chosen site reduces disease pressure, improves establishment speed, and largely determines whether your shrubs thrive for decades or struggle from the moment they go in the ground.
Successful green velvet boxwood planting begins with understanding what this cultivar needs from its environment. It performs best in a location that receives morning sun followed by afternoon shade or dappled light through the hottest months — direct afternoon sun in summer raises leaf temperature enough to cause scorch and opens the plant to the environmental stress that makes it more susceptible to fungal infection. ‘Green Velvet’ is notably more tolerant of full shade than many other boxwood varieties, which makes it genuinely useful in spots where other evergreen shrubs fail.
But avoid deep shade under dense tree canopies where air circulation is poor — that combination of low light, high humidity, and slow drying foliage creates the microenvironment in which boxwood blight spores germinate most readily. Before committing to a location, spend a few days observing how air moves through the space and how quickly foliage dries after rain. Those observations will tell you more about disease risk than any general guideline can.
Drainage is the other site variable that determines planting success at a fundamental level. Boxwood roots are shallow, fibrous, and highly sensitive to oxygen deprivation — when soil remains waterlogged for more than a day or two after rainfall, root cells begin to die and the Phytophthora and Pythium water molds that cause root rot rapidly colonize the damaged tissue.
Before you dig a single planting hole, perform the drainage test that separates suitable from problematic sites: dig a hole twelve inches deep, fill it with water, and time how long it takes to drain completely. If water remains after two hours, you either need to amend the soil structure aggressively, build raised planting mounds, or choose a better-drained location. Many gardeners skip this step and spend years wondering why their boxwood declines without any obvious above-ground cause — slow, chronic root damage from inadequate drainage is responsible for more losses than any disease.
Soil Preparation Before Any Green Velvet Boxwood Planting Project:
For Green Velvet Boxwood Planting, soil preparation is not complicated, but it is specific — get the pH, organic matter content, and drainage structure right before you plant and the shrubs will reward you with rapid establishment and strong disease resistance; get it wrong and you spend years compensating for problems that should never have existed.
The ideal soil for this shrub is a well-draining loam with a pH between 6.5 and 7.0. Boxwood is noticeably sensitive to soil acidity — when pH drops below 6.0, nutrient availability shifts in ways that cause the interveinal yellowing of leaves that many growers mistake for a disease symptom.
Magnesium and iron become less available in acidic soils, and their deficiency produces that characteristic pale, chlorotic appearance in older leaves that persists regardless of how much fertilizer you apply until the pH issue is addressed. Test your soil before green velvet boxwood planting and amend with ground limestone if pH is below the target range. If you are dealing with alkaline soil above pH 7.5, work in sulfur or an acidifying fertilizer to bring it down to an appropriate level for healthy root function.
Organic matter incorporation is equally important in the weeks before your plants go in the ground. Working three to four inches of finished compost into the top twelve inches of your bed improves drainage in heavy clay soils, improves moisture retention in sandy soils, raises biological activity that supports healthy mycorrhizal fungal associations in boxwood roots, and creates the loose soil structure that lets shallow roots spread rapidly during establishment.
Avoid fresh manure or high-nitrogen organic amendments that can burn fine root hairs during the vulnerable post-planting period. One addition worth including at the bottom of each planting hole is a small quantity of horticultural charcoal — it absorbs excess moisture around the root zone and has mild antifungal properties that can reduce the risk of early Pythium infection during the wet periods that follow any new green velvet boxwood planting. These preparation steps take a few extra hours before planting day, but they set the foundation for healthy, resilient shrubs that rarely need significant disease intervention.
Green Velvet Boxwood Planting Quick-Reference Table for Every Gardener:
Use this table as your at-a-glance reference throughout the planting process and the first two establishment seasons — every key variable, common mistake, and status indicator is captured in one place.
| Care Factor | Ideal Condition | Most Common Mistake | Status |
| Sun Exposure | Morning sun, afternoon dappled shade; tolerates full shade well | Direct afternoon summer sun causes leaf scorch and stress-related disease | Partial shade ideal |
| Soil Drainage | Well-draining loam; drainage hole empties within 1–2 hours after filling | Poorly drained clay causes Phytophthora root rot within one to two seasons | Test before planting |
| Soil pH | 6.5–7.0 for maximum nutrient availability and root health | Acidic soil below 6.0 causes magnesium deficiency and leaf yellowing | Test and amend first |
| Planting Depth | Root flare at or just above soil grade — never buried below grade | Planting too deep smothers the root flare and causes crown rot disease | Flare visible always |
| Spacing | 18–24 inches apart for hedges; 24–30 inches for specimen planting | Too-close spacing reduces airflow and raises boxwood blight infection risk | Err wider not closer |
| Mulch | 2–3 inch layer pulled 2–3 inches away from stem base at all times | Mulch touching stems creates persistent moisture that promotes crown rot | Never touch the stem |
| Watering | Deep weekly watering for the first two seasons; reduce in year three | Frequent shallow watering keeps surface moist and promotes root rot risk | Deep and infrequent |
| Fertilizer | Balanced slow-release in early spring; no fertilizing after August | Late-season nitrogen pushes tender growth vulnerable to winter injury | Spring application only |
| Pruning Season | Late spring after new growth hardens; light shaping in late summer | Pruning in wet conditions spreads boxwood blight spores on cutting tools | Dry conditions only |
| Disease Monitoring | Inspect for blight, root rot, and Volutella symptoms every two weeks | Ignoring early symptoms allows rapid spread through an entire hedge planting | Catch early always |
Watering Practices That Protect Your Green Velvet Boxwood Planting from Root Rot:
Watering is the care variable most directly connected to root rot risk in boxwood, and the difference between correct and incorrect technique shows up in the health of the root zone months before any above-ground symptoms appear. Getting it right from the beginning of your green velvet boxwood planting project protects the investment you have made in the ground.
1. First Season Watering:
During the first growing season after green velvet boxwood planting, the root system is confined to the original root ball and the immediate surrounding backfill. Water once per week during dry weather, applying enough to moisten the soil to a depth of eight to ten inches. Before each watering session, push a finger two inches into the soil near the root ball — if it feels cool and damp, skip the water and check again in two days.
This simple test prevents the chronic overwatering that creates the anaerobic root zone conditions where Pythium and Phytophthora microorganisms flourish and begin consuming root tissue long before any visible above-ground decline is apparent.
2. Avoiding Overwatering Effects:
The most common water-related problem in boxwood plantings is not drought but overwatering — and it is all the more damaging because it is invisible until it has already caused significant root system damage. Signs that overwatering has begun include leaves turning pale yellow uniformly rather than starting on the oldest growth, a musty smell rising from the soil surface, and a gradual wilting of new growth despite consistently moist soil.
If you notice these symptoms in your green velvet boxwood planting, reduce watering immediately, check that drainage holes in any raised bed or container are functioning, and consider applying a beneficial Trichoderma-based soil treatment to help suppress the Pythium population that has likely established in the root zone.
3. Drought Stress Signs:
While overwatering is the more common problem, underwatering produces its own set of identifiable symptoms worth knowing. Drought-stressed boxwood first shows bronzing or orange-toned discoloration in leaves rather than the green-to-yellow shift of root rot, and the soil around the root ball will be bone dry rather than saturated. Drought stress also lowers resistance to spider mite infestations and Volutella blight fungal infections targeting weakened tissue. During dry summers proper Green Velvet Boxwood Planting.
Mulching Strategies That Support Every Green Velvet Boxwood Planting Long-Term:
Mulching is one of the highest-return care practices in boxwood cultivation — done correctly it suppresses weeds, moderates soil temperature, retains moisture through summer heat, and protects the shallow root system from the freeze-thaw cycles that damage fine roots in winter. Done incorrectly, it becomes a disease vector.
1. Mulch Depth Guidelines:
Apply a two to three inch layer of shredded bark or wood chip mulch extending to the drip line of the shrub — the point directly below the outermost branch tips. This coverage zone corresponds to the active feeder root area and is where moisture retention and temperature moderation deliver the most benefit to the root system. For newly installed green velvet boxwood planting, a mulch ring extending twelve to eighteen inches in all directions from the stem provides excellent protection without creating the moisture accumulation at the stem base that leads to crown rot fungal infections in the first establishment season.
2. Volcano Mulching Risks:
Volcano mulching — piling mulch in a cone shape directly against the stem — is one of the most widespread and consistently harmful landscaping practices applied to boxwood. Mulch piled against the bark creates a persistently moist environment around the base of the stem that promotes crown rot caused by Phytophthora species and the Volutella stem blight fungus that specifically targets boxwood under conditions of chronic stem wetness. Always maintain a two to three inch gap between the inner edge of the mulch layer and the stem of any boxwood in your planting, regardless of how visually finished a mulch-to-stem contact might appear.
3. Mulch Material Choice:
Shredded hardwood bark and pine bark mulch are the best material choices for this type of planting bed — they decompose slowly, maintain their structure through rain and irrigation, and contribute a mild acidity as they break down that keeps soil pH in the range boxwood prefers. Avoid fresh green wood chips that can introduce fungal pathogens as they decompose, rubber mulch that provides no biological benefit to the soil beneath, and over-aged mulch that has already partially decomposed into a fine, dense mat that holds water against the soil surface and creates drainage problems around shallow boxwood roots.
Boxwood Blight and Fungal Diseases Threatening Your Green Velvet Boxwood Planting:
Boxwood blight is the most serious disease threat facing any green velvet boxwood planting project in North America today, and its spread through affected landscapes over the past decade has been rapid enough that every grower needs to understand its symptoms, transmission routes, and management options before putting a single plant in the ground.
1. Blight Symptom Recognition:
Boxwood blight caused by Calonectria pseudonaviculata produces characteristic dark brown circular lesions on leaves surrounded by a pale tan margin, progressing to complete defoliation of infected stems within days of initial symptom appearance during warm, wet weather. Dark brown to black streaking on green stems is a distinguishing sign that separates blight from other leaf spot diseases. Spores survive in fallen infected leaf litter for up to five years, making prompt removal of all dropped leaves from around your green velvet boxwood planting critically important for preventing reinfection in subsequent seasons. Inspect plants after every significant rain event during summer when disease pressure is highest.
2. Volutella Stem Blight:
Volutella blight caused by Pseudonectria buxi is the second most common fungal disease in boxwood plantings, producing a salmon-pink spore mass on infected stems during humid weather — a color and texture that distinguishes it clearly from boxwood blight. It typically enters plants through winter injury wounds or pruning cuts made with non-sterilized tools during wet conditions, spreading through the stem system and causing individual branch dieback that can be mistaken for winter kill in early spring. Prune out all infected material at least four inches below the visible discoloration using tools sterilized between each cut with a ten percent bleach solution or isopropyl alcohol spray.
3. Root Rot Control:
Phytophthora root rot is caused by oomycota water molds that live in soil as harmless background organisms until waterlogged conditions provide the anaerobic environment they need to switch from dormant to actively pathogenic states. Above-ground symptoms in affected boxwood include progressive yellowing of the entire plant, stunted new growth, and a reddish-brown discoloration of the inner bark at the crown level visible when the outer bark is scratched away. Removing a plant with confirmed Phytophthora infection and replacing it with clean soil rather than replanting into the same hole is the most reliable way to prevent recurrence in an established green velvet boxwood planting.
Yellow Leaf Diagnosis for Your Green Velvet Boxwood Planting This Season:
Yellowing leaves on boxwood are one of the most common symptoms growers bring to arborists and garden centers, and they are also one of the most misdiagnosed — because the visual appearance of yellowing looks similar whether it is caused by nutrient deficiency, soil pH problems, overwatering, or disease, yet each cause requires a completely different response.
1. Nutritional Deficiency Yellowing
The most common nutrient-related yellowing in boxwood is magnesium deficiency, which produces interveinal chlorosis — the veins stay green while the tissue between them fades to yellow or light orange — beginning on the oldest, innermost leaves of the plant. This pattern is distinctly different from the uniform yellowing of root rot or the circular lesions of fungal disease.
In Green Velvet Boxwood Planting, magnesium deficiency is almost always a symptom of pH imbalance rather than true soil magnesium shortage — the soil has enough magnesium but it is locked in unavailable forms by incorrect pH. Correcting soil pH resolves the yellowing far more effectively than adding magnesium supplements alone. Proper soil testing is essential for successful Green Velvet Boxwood Planting and long-term plant health.
2. Bacterial Leaf Scorch
Bacterial leaf scorch caused by Xylella fastidiosa — transmitted by leafhopper insects — produces an irregular browning pattern that progresses from leaf margins inward with a characteristic wavy boundary between healthy and scorched tissue that distinguishes it from both drought scorch and fungal leaf spots. The disease is chronic rather than acute; infected boxwood declines slowly over several seasons rather than collapsing quickly as with blight.
There is no chemical cure for systemic bacterial infection — oxytetracycline injections by a certified arborist can manage symptoms in valuable specimens, but the most cost-effective response for smaller plantings is removal of severely affected plants and replacement with confirmed disease-free nursery stock. Careful monitoring during Green Velvet Boxwood Planting helps gardeners detect bacterial problems before they spread through nearby shrubs.
3. Winter Bronzing Explained
Distinguish winter bronzing from true yellowing by its color — orange-bronze rather than yellow-green — and its timing — appearing only after sustained cold rather than developing progressively through the growing season as nutrient and disease symptoms do. Understanding seasonal color changes is important for healthy Green Velvet Boxwood Planting because many gardeners mistake natural winter bronzing for disease. Proper drainage, winter protection, and regular maintenance all support stronger Green Velvet Boxwood Planting throughout colder months. Healthy Green Velvet Boxwood Planting practices also reduce stress and improve year-round foliage color.
Fertilizing and Long-Term Care for Your Green Velvet Boxwood Planting:
Boxwood is not a heavy feeder, and the biggest fertilization mistake most growers make is applying too much rather than too little — excess nitrogen produces soft, rapidly growing tissue that is simultaneously more attractive to pest insects and more susceptible to the fungal diseases that define the greatest ongoing health threats to established boxwood hedges.
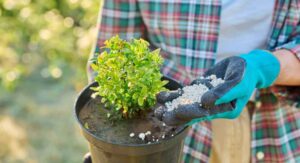
1. Spring Fertilizer Application:
The single most productive annual fertilizer application for boxwood is a balanced slow-release granular fertilizer — something in the range of 10-6-4 or similar — broadcast evenly beneath the drip line in early spring just as new growth begins emerging. Apply at the manufacturer’s recommended rate, water thoroughly, and do not supplement with additional quick-release nitrogen during the growing season. The slow-release formulation feeds the plant steadily over twelve to sixteen weeks, matching the natural pace of boxwood root uptake and avoiding the surge-growth periods that fast-release nitrogen creates.
2. Soil Biology Investment:
One of the most effective long-term care strategies is investing in soil biology through annual organic matter additions that feed the mycorrhizal fungal networks and beneficial bacterial communities that dramatically improve root health and disease resistance. Applying a half-inch layer of finished compost beneath the mulch ring each spring — worked gently into the top inch of soil — introduces billions of beneficial microorganisms that compete with harmful Phytophthora and Pythium species for root zone resources and produce antifungal compounds that protect root surfaces from pathogenic colonization throughout the growing season.
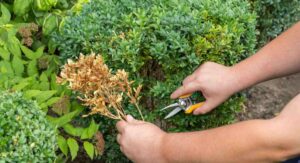
3. Pruning Tool Hygiene:
Pruning tool hygiene is arguably the most underappreciated disease management practice in boxwood care. Boxwood blight spores can persist on cutting blade surfaces and be transmitted from infected to healthy plants in a single pruning session. Clean all pruning tools with a ten percent bleach solution or seventy percent isopropyl alcohol spray between each plant — not just between sessions. Prune only during dry weather when foliage surfaces are completely dry, and never prune during or immediately after rain when spore dispersal is at its highest. These habits take less than a minute per plant and prevent the disease events that take seasons to manage after the fact.
Five Warning Signs Your Green Velvet Boxwood Planting Needs Urgent Action:
Each of these symptoms points to a specific, identifiable problem — and in boxwood, acting quickly on early warning signs is the difference between a recoverable situation and the loss of plants that took years to establish.
- Dark leaf lesions with tan margins after rain signal active boxwood blight fungal infection.
- Uniform plant-wide yellowing despite moist soil confirms Phytophthora root rot destroying roots below.
- Salmon-pink spore masses on stems reveal Volutella blight requiring immediate sterile pruning response.
- Progressive branch dieback from the inside out indicates Phytophthora crown rot advancing through vascular tissue.
- Interveinal yellow leaves on old growth point to magnesium deficiency caused by incorrect soil pH.
Step-by-Step Installation Guide for Successful Green Velvet Boxwood Planting Projects:
This sequence covers the complete process from site preparation to post-planting care — follow each step in order and you give your boxwood the best possible start for establishment and long-term health.
- Test soil pH and drainage four to six weeks before your target planting date.
- Amend soil with compost and lime or sulfur to reach pH 6.5 before planting.
- Dig each hole two to three times wider than the root ball but no deeper.
- Set root flare at or just above grade — never bury the crown below soil.
- Apply a two-inch mulch ring to the drip line; maintain a clean gap around the stem.
Conclusion
Done right, green velvet boxwood planting creates one of the most enduring and structurally elegant features any landscape can offer. The shrubs are long-lived, cold-hardy, and rewarding to maintain once they are properly established. Apply the site selection, soil preparation, watering, and disease prevention strategies from this guide and your boxwood will stay healthy, dense, and beautiful for decades ahead.
FAQ’s
Q1. When is the best time to start green velvet boxwood planting?
Early spring and early fall are the best seasons for green velvet boxwood planting — mild temperatures support rapid root establishment without heat or frost stress.
Q2. How deep should the hole be for green velvet boxwood planting?
Dig each hole exactly as deep as the root ball height, but two to three times wider to encourage strong lateral root expansion after establishment.
Q3. What soil pH produces the healthiest green velvet boxwood planting results?
A pH between 6.5 and 7.0 is ideal — acidic soil below 6.0 causes nutrient lockout and the interveinal leaf yellowing that confuses many first-time growers.
Q4. How do I prevent boxwood blight after green velvet boxwood planting?
Sterilize pruning tools between plants, improve spacing for better airflow, and apply preventive fungicide during warm wet weather to keep blight from establishing.
Q5. How often should I water during the first season after planting?
Deep watering once per week during dry weather gives newly installed boxwood the moisture it needs without the saturation that leads to Phytophthora root rot.
Q6. Why are the leaves on my boxwood turning yellow after planting?
Yellow leaves typically signal magnesium deficiency from low soil pH, overwatering, or early-stage Phytophthora root rot developing unseen in the root zone beneath the surface.
Q7. What spacing works best for a formal hedge planting?
Space shrubs 18 to 24 inches apart for hedges — tighter spacing reduces air flow significantly and raises fungal disease risk across the entire row over time.
Q8. Should I fertilize at the time of planting or wait?
Wait until the second spring after green velvet boxwood planting before applying fertilizer — early feeding stresses new roots and pushes growth the plant cannot yet support.
Q9. How long does it take for boxwood to establish after planting?
This cultivar typically reaches full establishment — with an independent, drought-tolerant root system — within two to three complete growing seasons after careful initial installation.
Summary
Green velvet boxwood planting rewards careful preparation with decades of structural beauty and low-maintenance elegance. The nine strategies in this guide — covering site selection, soil amendment, correct planting depth, mulching, watering discipline, fertilization, and disease management — give every new planting the strongest possible foundation for long-term establishment. Understanding the fungal diseases, bacterial infections, root rot risks, and yellowing patterns that affect boxwood turns reactive problem-solving into proactive prevention. Approach your green velvet boxwood planting project with this knowledge and you will grow hedges and specimens that remain healthy, dense, and visually striking through every season for years to come.