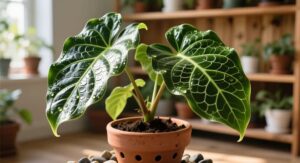
I bought my first alocasia plant on impulse at a weekend market — those enormous arrow-shaped leaves with their dramatic silver-green veining were unlike anything I had ever seen in a garden center, and I simply could not walk away. Within a month, the bottom leaves had turned yellow and collapsed, the remaining foliage had developed brown crunchy edges, and I found myself staring at a sad, drooping specimen wondering what I had done wrong. That first alocasia soil mix failed entirely, but it sent me on a research deep-dive that transformed how I approach tropical plant care forever.
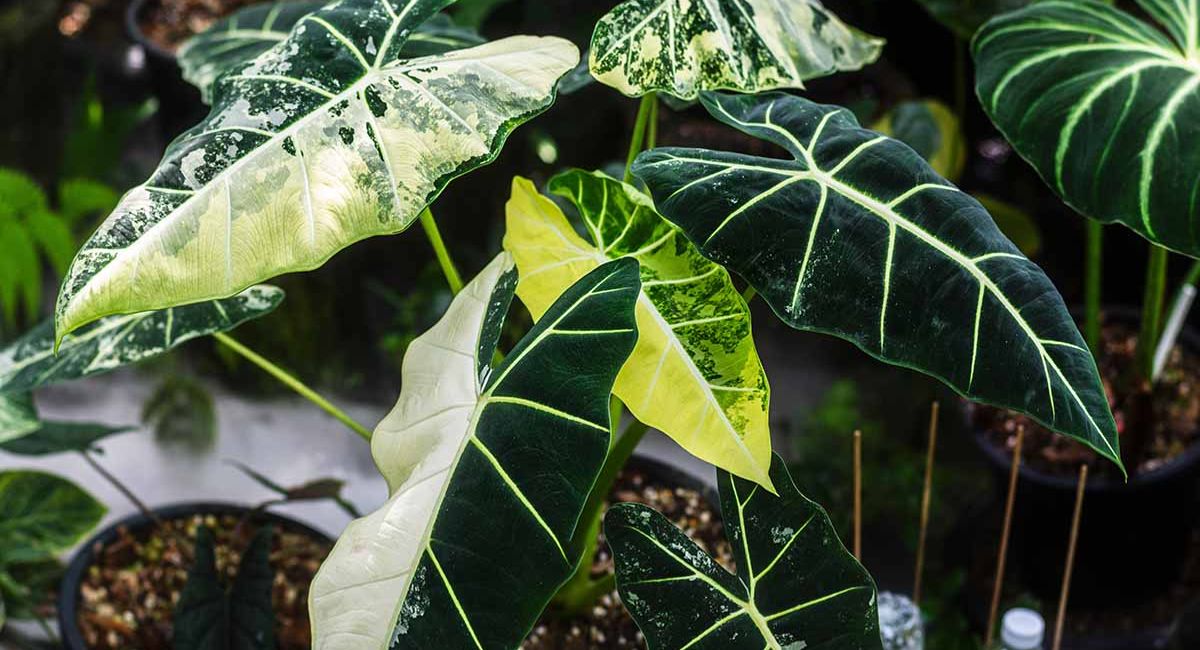
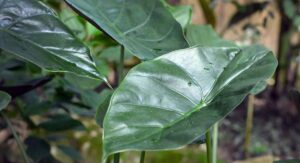
The alocasia plant, belonging to the Araceae family and comprising over ninety wild species native to the tropical rainforests of Southeast Asia and the Pacific Islands, is one of the most architecturally spectacular houseplants available to indoor gardeners worldwide. Commonly known as Elephant Ear or African Mask plant depending on the cultivar, this genus produces leaves of extraordinary size, texture, and color variation that make a single specimen a dramatic focal point in any interior space.
Master your alocasia plant’s precise care requirements and enjoy bold, breathtaking tropical foliage growth that commands attention in every room.
Alocasia Plant Origins Reveal Its Precise Indoor Care Needs:
Understanding where the alocasia plant evolved is the single most important step toward becoming a successful caretaker of this demanding tropical genus. In its native habitat across the lowland and montane rainforests of Borneo, the Philippines, northeastern Australia, and the broader Indo-Pacific region, the alocasia soil mix grows as a large understory or forest-edge perennial where temperatures remain warm and consistent year-round, humidity rarely drops below seventy percent, soil is rich with decomposing organic matter that drains freely despite constant moisture availability, and light arrives filtered through a multi-layered canopy above.
The alocasia plant grows from a corm — a compressed underground storage organ — that allows it to survive periods of seasonal stress in the wild by retreating into dormancy. This dormancy behavior frequently alarms indoor growers during winter months when the alocasia soil mix suddenly drops leaves and appears to be dying, when in reality it is simply following an ancient seasonal rhythm embedded in its genetics.
Alocasia Plant Care Essential Requirements at a Glance:
Use this comprehensive reference table to keep all critical alocasia plant care variables organized and immediately actionable throughout every season of growth and dormancy.
| Care Factor | Ideal Condition | Warning Symptom | Corrective Action |
| Light | Bright indirect, 6+ hrs daily | Pale faded leaves, leggy stems | Move to east window, add grow light |
| Watering | Top 2 inches dry before watering | Yellow leaves, soggy base | Reduce frequency, check drainage |
| Humidity | 60–80% relative humidity | Brown crispy leaf margins | Use humidifier or pebble tray |
| Temperature | 65–85°F (18–29°C) consistently | Leaf drop, sudden wilting | Remove from cold drafts and vents |
| Soil mix | Chunky, well-aerated, fast-draining | Root rot, fungal odor from pot | Repot with perlite + orchid bark blend |
| Pot type | Terracotta or breathable material | Prolonged wet soil, root death | Repot from glazed ceramic immediately |
| Fertilizer | Dilute balanced feed monthly | Slow growth, pale new leaves | Half-strength balanced liquid monthly |
| Repotting | Spring, when rootbound | Roots circling pot base heavily | Upsize by 2 inches, inspect roots |
| Pests | No webbing, spots, or sticky residue | Stippling, curling, white deposits | Neem oil spray, isolate immediately |
| Dormancy | Reduced winter watering, no feed | Sudden leaf drop in winter | Maintain warmth, reduce water only |
Alocasia Plant Light Requirements Control All Growth and Vigor:
Light management is foundational to every other aspect of alocasia plant health — get illumination right and every other care element becomes more forgiving, while inadequate light undermines even perfect watering and humidity management completely.
1. Bright Indirect Best:
The alocasia plant thrives in bright indirect light — the kind delivered by an east-facing window or a position set back slightly from a south or west window filtered by a sheer curtain. Under these conditions, photosynthesis runs at full capacity, new leaves emerge large and fully pigmented, and the plant’s immune system remains robust enough to resist fungal pathogens, bacterial infections, and the microorganism-related root problems that consistently plague light-starved specimens of this demanding but spectacular tropical genus.
2. Direct Sun Damage:
Exposing an alocasia plant to harsh direct afternoon sunlight causes rapid, irreversible photobleaching of the leaf tissue — large pale or tan patches appear within days, and no recovery is possible once cells are destroyed. Sun-scorched leaves also develop micro-tears in the cuticle layer that function as open wounds, providing entry points for bacterial pathogens like Xanthomonas and opportunistic fungal spores that spread from these initial damage sites throughout the remaining healthy alocasia soil mix foliage in humid indoor conditions.
3. Low Light Consequences:
An alocasia plant kept too far from any meaningful light source slows photosynthesis to the point where metabolic processes cannot sustain healthy tissue. New leaves emerge small and pale, older leaves yellow and drop prematurely from the base upward, and reduced metabolic rate means the plant absorbs water far more slowly — leaving soil wet for prolonged periods that create the anaerobic conditions favoring Pythium, Phytophthora, and Fusarium root rot pathogens that can destroy the entire corm and root system within just a few weeks of sustained waterlogging.
Alocasia Plant Watering Discipline Prevents Most Health Crises:
Watering the alocasia plant correctly is the skill that separates thriving specimens from chronically struggling ones — this species demands a precise balance of consistent moisture and excellent drainage that rewards disciplined, attentive caretakers with extraordinary foliar growth season after season.
1. Overwatering Root Rot:
Overwatering is the leading cause of alocasia soil mix death in home environments, bar none. When the growing medium stays saturated, oxygen is displaced from the root zone and destructive water mold pathogens — principally Pythium aphanidermatum and Phytophthora parasitica — proliferate rapidly among vulnerable root tissues. The first visible symptoms of root rot in an alocasia soil mix are yellowing lower leaves and soft, discolored petioles at the soil line; by the time these appear above ground, significant root system damage has typically already occurred below, making early action critical for plant survival and recovery.
2. Underwatering Stress Signs:
An underwatered alocasia plant communicates distress through drooping petioles, curling leaf edges, and rapidly browning margins before entire leaves collapse and drop from the plant. Persistent underwatering cycles cause the corm to shrink and the feeder roots to desiccate and die back, creating entry sites for secondary bacterial infections — particularly soft rot bacteria from the Erwinia and Pectobacterium genera — that exploit root wounds and spread through the vascular system with alarming speed in already-stressed alocasia soil mix specimens.
3. Correct Watering Technique:
Water your alocasia soil mix thoroughly when the top two inches of soil feel dry — not when the surface appears dry, but when you probe two finger-lengths into the growing medium and confirm dryness at that depth. Pour water slowly and evenly over the entire soil surface until it drains freely from the bottom, then empty the saucer after thirty minutes. Use room-temperature filtered or rainwater when possible — the alocasia soil mix is sensitive to fluoride and chlorine in tap water, which causes progressive leaf tip burn that mimics but is distinct from humidity-related margin damage.
Alocasia Plant Humidity Management Protects Against Leaf Problems:
High ambient humidity is non-negotiable for a healthy alocasia plant — it is the environmental factor most commonly neglected by indoor growers and the most frequent cause of the chronic leaf-tip browning, crispy margins, and general foliage deterioration that frustrates even attentive caretakers who otherwise provide excellent light and watering discipline consistently.
1. Ideal Humidity Range:
The alocasia plant performs best at sixty to eighty percent relative humidity — levels that most standard homes with heating or air conditioning fail to reach naturally without intervention. Below fifty percent humidity, the large leaf surface area of the alocasia soil mix loses moisture through transpiration faster than the root system can replace it, causing progressive cell death at the margins that appears as the characteristic brown crunchy edges that signal atmospheric dryness stress rather than watering problems or root disease in this sensitive tropical species.
2. Humidifier vs Misting:
A small ultrasonic humidifier running within three to four feet of your alocasia soil mix is by far the most effective humidity solution — it raises ambient moisture consistently without wetting leaf surfaces, avoiding the gray mold outbreaks (Botrytis cinerea) that develop readily on regularly misted alocasia soil mix foliage kept in poorly ventilated spaces. Misting creates ideal germination conditions for fungal spores that land on the large, flat, moisture-retaining leaf surfaces, leading to fungal leaf spot lesions that spread rapidly between leaves in close proximity.
3. Grouping Plants Together:
Grouping your alocasia soil mix with other moisture-loving tropicals creates a naturally humid microclimate through collective transpiration — plants release water vapor through their stomata during active photosynthesis, raising the relative humidity within their shared airspace meaningfully. This passive technique works best in combination with a pebble tray placed beneath the alocasia soil mix pot filled with water just below the pebble surface level, which adds a continuous source of localized evaporative humidity without creating the soil saturation that triggers root rot or fungal corm disease in susceptible specimens.
Alocasia Plant Disease Identification Saves Leaves Before Damage Spreads:
Disease pressure on the alocasia plant comes from multiple pathogenic sources — fungal, bacterial, and viral organisms all pose genuine threats to this tropical species, and distinguishing between them determines whether treatment succeeds or the infection progresses unchecked to destroy the entire plant through cumulative tissue damage.
1. Fungal Infection Patterns:
Fungal diseases attacking an alocasia plant most commonly manifest as circular or irregular dark brown lesions with concentric rings or yellow halos — the hallmark of Alternaria and Cercospora leaf spot pathogens. Root zone fungal infections caused by Rhizoctonia solani appear as dark brown stem lesions at the soil line accompanied by sudden wilting. Treat early-stage fungal infections on your alocasia soil mix with neem oil or copper-based fungicide sprays applied to all leaf surfaces, and always improve air circulation and reduce leaf wetness to slow further spore germination and spread throughout the plant canopy.
2. Bacterial Leaf Blight:
Bacterial blight caused by Xanthomonas axonopodis produces water-soaked, translucent patches on alocasia soil mix leaves that rapidly expand, turn brown, and develop yellow borders. The pathogen spreads through contaminated water splash, infected tools, and the feeding wounds created by sap-sucking insects that move between plants. Remove all infected leaves immediately using alcohol-sterilized scissors, avoid overhead watering entirely, and improve air movement around the alocasia soil mix — bacterial blight has no effective chemical cure once established in the vascular tissue, making sanitation and environmental management the only reliable control strategies available.
3. Viral Mosaic Symptoms:
Mosaic virus infections — transmitted primarily by aphids and thrips that pierce leaf tissue and inject viral particles directly into the plant’s vascular system — cause distinctive irregular yellow mottling, distorted new leaf emergence, and stunted petiole development in affected alocasia soil mix specimens. Viral infections are systemic and incurable — the virus replicates in every cell of the plant and cannot be eliminated with any treatment. Discard any alocasia soil mix confirmed to carry mosaic virus to prevent insect-mediated spread to healthy neighboring plants in your collection, and implement aggressive pest management to prevent future viral introductions through sap-feeding insects.
Alocasia Plant Common Pests Indicate Underlying Environmental Stress:
Pest infestations on an alocasia plant rarely happen to plants thriving in ideal conditions — they almost invariably signal environmental stress that has compromised the plant’s natural defenses, making it more attractive and accessible to opportunistic insects seeking weakened hosts. Address root causes alongside pest control for lasting results.
- Spider mites thrive in low humidity, spinning fine webbing across dry, stressed alocasia plant leaf undersides rapidly.
- Mealybugs cluster in alocasia soil mix at petiole joints, secreting sticky honeydew that promotes sooty mold fungal colonization.
- Scale insects attach to alocasia soil mix stems as waxy brown lumps, slowly draining essential sap from the vascular system.
- Fungus gnats breed prolifically in overwatered alocasia soil mix soil, with larvae feeding destructively on vulnerable feeder roots below.
- Thrips rasp alocasia soil mix leaf surfaces, causing silver streaking and simultaneously transmitting tospoviruses between plants nearby.
Alocasia Plant Soil and Repotting Choices Directly Prevent Root Disease:
The growing medium you choose for your alocasia plant has far-reaching consequences beyond simple nutrition — it determines drainage speed, root-zone oxygen availability, and the microbial community composition that either actively protects or passively allows dangerous pathogen populations to build up around the sensitive corm and root system.
- Use a chunky mix combining potting soil, perlite, and orchid bark for ideal alocasia plant root-zone aeration and drainage.
- Never use dense, water-retentive mixes designed for succulents or heavy clay soils with your sensitive alocasia soil mix roots.
- Repot every one to two years in spring, inspecting roots and trimming any brown, mushy, or damaged tissue carefully.
- Always sterilize repotting tools with isopropyl alcohol to prevent introducing fungal or bacterial pathogens to the fresh alocasia soil mix soil.
- Choose terracotta or unglazed pots with multiple drainage holes to allow alocasia soil mix roots continuous access to oxygen.
Alocasia Plant Yellow Leaves Signal Specific Diagnosable Problems:
Yellow leaves on an alocasia plant are among the most common concerns raised by growers — but the yellowing pattern, speed of progression, and accompanying symptoms all point toward specific, identifiable causes that respond to targeted corrective actions rather than general guesswork or panic reporting.
1. Root Rot Yellowing:
When yellow leaves on an alocasia soil mix appear alongside soft stems at the soil line, wilting despite moist soil, and a foul odor from the growing medium, root rot caused by Pythium or Fusarium pathogens is the likely culprit. Unpot the plant, remove all brown mushy roots with sterile scissors, dust clean cuts with cinnamon or sulfur powder as a natural antimicrobial barrier, and repot into completely fresh dry mix. Place the recovering alocasia soil mix in bright indirect light and withhold water for five days to allow cut roots to become callous before introducing moisture back into the growing medium around the damaged root system.
2. Nutrient Deficiency Signs:
Yellowing restricted to the space between veins on newer upper leaves of an alocasia soil mix — while veins themselves remain green — indicates iron or manganese deficiency caused by soil pH drift above 7.0 that locks these micronutrients into chemically unavailable forms. This interveinal chlorosis in the alocasia soil mix responds well to foliar application of chelated iron spray and soil acidification with dilute sulfur or pH-down amendments. Test growing medium pH with an inexpensive soil meter before treating, as applying iron to soil with already-correct pH will not resolve the deficiency and may cause other micronutrient imbalances.
3. Natural Leaf Senescence:
Not every yellow leaf on an alocasia plant signals a crisis — natural senescence causes the oldest, lowest leaves to yellow and drop as the plant allocates energy toward new growth at the crown. This normal cycle typically affects one leaf at a time, progresses slowly over one to two weeks, and is not accompanied by stem softness, soil odor, or simultaneous yellowing of multiple leaves across different levels.
Alocasia Plant Propagation and Dormancy Care Ensure Year-Round Success:
Understanding the full annual lifecycle of the alocasia plant — including its propagation methods and winter dormancy behavior — equips growers with the knowledge to respond appropriately to every seasonal change this tropical genus undergoes throughout the entire calendar year without unnecessary alarm or intervention.
1. Corm Division Method:
The most reliable propagation method for the alocasia plant is corm division performed during spring repotting. Carefully unpot the plant, brush soil from the root mass, and identify offset corms — small rounded structures attached to the main corm that can be gently separated with a sterilized blade. Dust all cut surfaces with powdered cinnamon or activated charcoal to prevent bacterial and fungal infection at the wound site, then pot each offset individually in a small container with well-draining mix, maintaining the same care conditions as the parent alocasia soil mix while new growth establishes over the following six to eight weeks.
2. Winter Dormancy Management:
When an alocasia soil mix drops all its leaves in autumn or early winter, most first-time growers assume the plant has died and discard it — a heartbreaking and entirely avoidable mistake. Dormancy is a normal and healthy survival mechanism in which the alocasia soil mix retreats to its corm, conserving energy through the low-light, lower-temperature months of winter.
3. Post-Dormancy Revival Care:
When a dormant alocasia soil mix begins pushing new growth in spring, resist the temptation to immediately return to full-intensity care. Reintroduce watering gradually over two weeks, increasing frequency as leaf size grows and root activity increases. Hold fertilization until at least two fully expanded leaves have emerged, then resume a monthly half-strength balanced liquid feed schedule. New growth from a well-rested alocasia soil mix emerges with remarkable vigor — leaves are often larger and more vividly patterned than those produced the previous season, rewarding patient and attentive growers with dramatic foliar displays throughout the entire active growing season.
Conclusion
The alocasia plant demands informed, attentive care — but repays that effort with some of the most spectacular foliage in the houseplant world. Prevent root rot, address fungal infections early, manage bacterial and viral threats through vigilance, and diagnose yellow leaves precisely to keep your alocasia soil mix thriving. Understand its dormancy, respect its humidity needs, and this extraordinary tropical species will reward you with breathtaking, enduring beauty year after year.
FAQ’s
Q1. Why are my alocasia plant leaves turning yellow so rapidly?
Yellow leaves on an alocasia plant usually indicate overwatering, root rot, or a natural senescence cycle progressing normally.
Q2. How much humidity does my alocasia plant actually need?
Your alocasia plant needs sixty to eighty percent relative humidity — well above typical indoor air moisture levels without active intervention.
Q3. Can root rot kill an alocasia plant permanently without recovery?
Yes — untreated root rot destroys the alocasia plant corm completely, but early intervention with fresh soil and pruning saves it.
Q4. What causes brown crispy edges on my alocasia plant leaves?
Brown leaf margins on an alocasia plant indicate low humidity, fluoride toxicity from tap water, or inconsistent watering stress cycles.
Q5. How do I treat fungal leaf spots on my alocasia plant?
Remove infected leaves from your alocasia plant, apply copper fungicide spray, and improve ventilation to halt further fungal spread.
Q6. Is my alocasia plant dead when it drops all its winter leaves?
No — your alocasia plant is entering normal dormancy and will re-sprout vigorously from its corm the following spring season.
Q7. How often should I water my alocasia plant during active summer growth?
Water your alocasia plant when the top two inches of soil are dry — roughly every five to eight days in summer.
Q8. What soil mix prevents root rot in an alocasia plant most effectively?
A chunky blend of potting soil, perlite, and orchid bark gives the alocasia plant fast drainage and excellent root-zone aeration.
Q9. How do I propagate my alocasia plant at home successfully?
Propagate your alocasia plant by dividing offset corms during spring repotting and potting each separately in fresh mix.
Summary
The alocasia plant is a breathtaking tropical masterpiece that rewards deep, informed care with some of the most dramatic foliage the plant kingdom produces. Mastering its requirements — bright indirect light, consistent but measured watering, high ambient humidity, chunky well-draining soil, and seasonal dormancy respect — creates the conditions for this extraordinary genus to express its full potential in any indoor environment. Vigilance against root rot, prompt treatment of fungal infections, early identification of bacterial blight and viral mosaic disease, disciplined pest management, and accurate yellow-leaf diagnosis are the practical skills that separate thriving alocasia soil mix collections from struggling ones.