I spent the better part of that winter figuring out what I had done wrong — reading through botany papers on bromeliad trichome physiology, haunting online forums where experienced collectors talked candidly about the fungal infections, bacterial rots, and care mistakes that separate a thriving air plants tillandsia display from a graveyard of desiccated husks. What I found surprised me. These were not low-maintenance plants being kept alive through neglect. They were plants with very specific needs that, once understood, made their care feel almost effortless — but not before.
This guide covers what genuinely matters for long-term success with air plants tillandsia: the biology behind their care, the specific disease and pest problems that most commonly go undiagnosed until it is too late, the seasonal adjustments that keep collections healthy through changing indoor conditions, and the species selection logic that matches the right plant to the right environment from the beginning rather than the wrong plant to the wrong shelf.
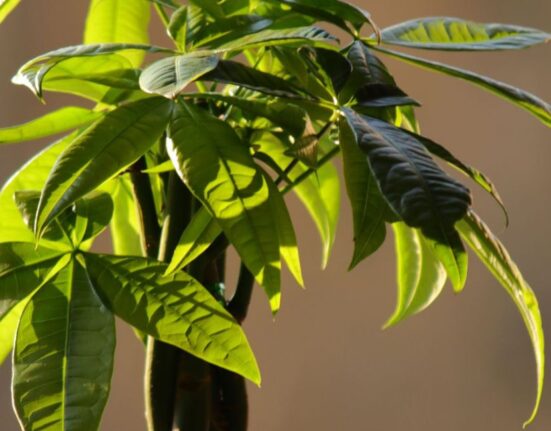
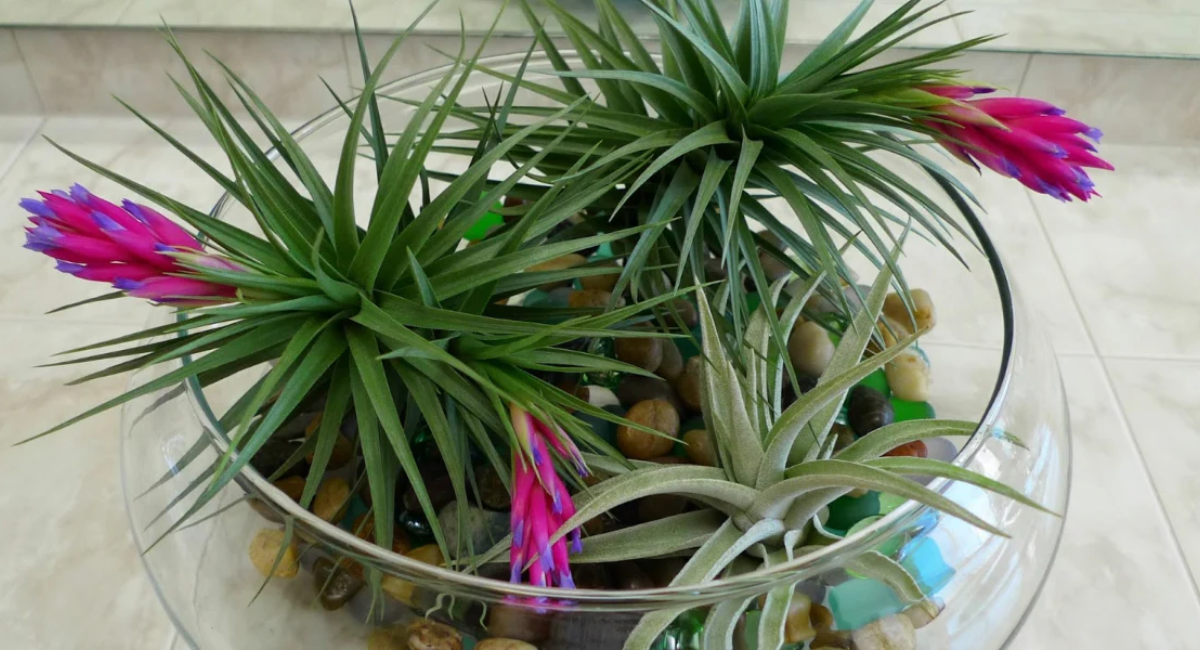
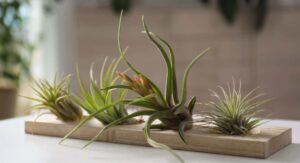
These fascinating air plants tillandsia require no soil, thrive almost anywhere, and add stunning natural beauty to any living space.
Air Plants Tillandsia Understanding How These Epiphytes Actually Work:
The single most useful thing you can know about air plants tillandsia is that their leaves are the organs doing the work that roots do in every other plant you have ever grown. The trichomes — those tiny, overlapping, hair-like scales that give xeric species their silvery shimmer — open when wet to pull in moisture and dissolved nutrients, then close tightly as they dry to lock in what was absorbed.
This is the entire feeding and watering mechanism. Everything about correct care follows directly from understanding this one biological fact. If the leaves do not get properly wet, the plant does not get watered regardless of how much moisture reaches the base or the roots.
What this means practically is that the watering method matters far more than the watering schedule. A plant soaked fully for thirty minutes twice a week is in a completely different physiological state than one misted daily but never fully saturated — the former has trichomes that close to full and the latter has trichomes that are perpetually damp without ever being properly hydrated.
Root rot, in the traditional sense, does not apply here because these roots do nothing metabolically. What destroys air plants tillandsia is crown rot — water sitting in the packed leaf bases at the growing centre without adequate airflow to evaporate it before fungal and bacterial pathogens establish. That distinction matters enormously when diagnosing problems.
Air Plants Tillandsia Mastering Watering Without Creating Crown Rot:
The soaking method is the gold standard for air plants tillandsia watering, and not because it is the easiest — it is not, compared to a quick misting. It is the standard because it is the only method that reliably saturates the trichomes on every leaf surface including the innermost ones that never get properly wet during misting. Fill a bowl with room-temperature water — not tap water fresh from the cold faucet, not softened water, ideally rainwater or filtered water — submerge the plants fully for twenty to forty minutes, then lift them out and shake them firmly to dislodge every visible droplet from the leaf axils and crown.
Place them upside down on a towel in a spot with good air movement for at least four hours before returning them to their display. That four-hour drying window is not optional. It is the difference between a healthy plant and a rotting one.
Water quality deserves more attention than it usually gets in beginner guides. Municipal tap water contains chlorine, and in many areas chloramines, that damage trichome structures over repeated soakings — fill your soaking bowl the night before and leave it uncovered to allow chlorine to off-gas, or simply collect rainwater when you can because it tends to be naturally soft and slightly acidic in a way these plants evolved to receive.
Hard water is the subtler long-term problem: the calcium and mineral salts it deposits on leaf surfaces build up over months into a crust that physically blocks trichome function. If your air plants tillandsia seem progressively less responsive to watering over time despite a consistent routine, accumulated mineral deposits are usually the culprit. A gentle wipe-down of the leaves with a soft damp cloth monthly, and an occasional soak in distilled water, clears this buildup before it becomes a serious performance issue.
Air Plants Tillandsia Complete Care Reference Table:
| Factor | Requirement | Frequency | Notes |
| Watering Method | Full soak in clean water | 2 to 3 times weekly | Shake off excess after always |
| Light Needs | Bright indirect sunlight | 6 to 8 hours daily | No harsh direct midday sun |
| Airflow | Constant gentle circulation | Always required | Prevents deadly crown rot |
| Humidity Level | 50 to 70 percent ideal | Year-round monitoring | Mist lightly in dry winters |
| Temperature | 55 to 90 degrees Fahrenheit | All growing seasons | Never expose to frost ever |
| Fertilization | Bromeliad liquid quarter-strength | Once monthly spring-summer | Dilute carefully before applying |
| Mounting Options | Driftwood, cork, or shells | Permanent display placement | Never use copper wire mounts |
| Fungal Prevention | Diluted neem oil spray | Bi-weekly in spring | Prevents rot and leaf mildew |
| Bloom Care | Phosphorus-boosted fertilizer | Pre-bloom season only | Encourages reliable flower spike |
| Pest Treatment | Isopropyl alcohol on cotton | As symptoms appear | Removes scale and mealybugs |
Air Plants Tillandsia Recognising and Responding to Common Diseases:
Most air plants tillandsia losses are preventable once you know what to look for. The three problems below account for the majority of decline cases in both beginner and established collections — and all three are easier to stop early than to reverse late.
1. Crown Rot:
For Air Plants Tillandsia, crown rot starts quietly. A faint darkening at the base of the innermost leaves, a softness where there should be firmness, sometimes a smell that is easy to miss until you hold the plant close. By the time the outer leaves show obvious browning and the crown is visibly collapsed, the situation is usually irreversible. The pathogens responsible — Pythium, Fusarium, and Phytophthora species — are fungal microorganisms present in most environments that become dangerous specifically when water sits in the packed leaf bases longer than the plant can safely handle.
The fix for early-stage crown rot in air plants tillandsia is aggressive: remove all soft, discoloured tissue with sterilised scissors cutting into clean growth, dust the cut surfaces with powdered cinnamon or activated charcoal as a natural antifungal barrier, and place the plant somewhere with strong airflow and no water for several days while you assess whether recovery is underway. Prevention is always preferable — the shake-and-invert post-soak protocol described above eliminates the vast majority of crown rot risk.
2. Leaf Blight:
In Air Plants Tillandsia, leaf blight tends to begin at the tips or margins of individual leaves rather than at the crown — brown, water-soaked lesions that expand inward along the leaf surface, sometimes producing the grey dusty spore masses that identify Botrytis cinerea as the pathogen involved. The bacterial species Pseudomonas and Xanthomonas cause a similar presentation — water-soaked spots that turn yellow then brown and may exude a faintly sticky residue during humid conditions.
Both types enter through physical damage, senescent tissue, and the micro-abrasions created when plants rub against rough mounting surfaces during handling. Remove affected leaves at their base with clean scissors, apply a diluted copper-based fungicide spray to surrounding healthy tissue, and review your mounting and handling practices to reduce the physical damage that gives these pathogens their entry points.
3. Scale Insects:
On Air Plants Tillandsia, scale insects look at first like natural features of the plant — tiny, flat, waxy brown or white discs attached firmly along leaf surfaces and stems. They feed on plant sap continuously, introducing compounds that create the yellow halo discolouration characteristic of scale damage while simultaneously weakening the plant’s overall resistance to secondary fungal infection.
Light infestations respond well to physical removal using a soft toothbrush or cotton swab dipped in diluted isopropyl alcohol, followed by weekly inspections to catch any survivors or new arrivals before populations rebuild. Heavier infestations require a follow-up application of insecticidal soap solution to the entire plant, with particular attention to the leaf bases where crawlers shelter between life stages.
Air Plants Tillandsia Yellow Leaves — Reading What They Tell You:
Yellow leaves on air plants tillandsia are one of those symptoms that looks like a single problem but can mean at least six different things depending on where the yellowing starts, how it progresses, and what other changes accompany it. Getting the diagnosis right matters because the wrong treatment can accelerate the exact problem you are trying to solve.
1. Light Shortage:
In Air Plants Tillandsia, light deficiency produces a slow, even pallor that begins on outer leaves and drifts inward as the plant shifts its limited chlorophyll toward the growing centre where new leaf production demands the most energy. The leaves do not go suddenly yellow — they gradually lose their green intensity over weeks, sometimes developing an almost translucent, washed-out quality before the yellowing becomes obvious.
Moving the plant closer to a bright window or adding a full-spectrum grow light typically reverses this within a few weeks in specimens that have not been too severely depleted. The minimum practical threshold is six hours of bright indirect light daily, and north-facing windows in winter rarely deliver this in temperate climates.
2. Moisture Problems:
Water-related yellowing presents very differently from light deficiency. It tends to originate at the leaf bases nearest the crown and move outward toward the tips, and it is usually accompanied by softening of the affected tissue and sometimes an unpleasant smell — signs that pathogen activity, not simple stress, is involved.
Here is the diagnostic paradox that trips up many growers of air plants tillandsia: moisture-related yellowing can result from both too much retained water in the crown and, occasionally, from genuinely insufficient hydration. In the first case, the trichomes are wet but the crown is rotting. In the second, the trichomes never reach full saturation and the plant slowly dehydrates between waterings. The distinction usually comes down to texture — soft and mushy means crown rot, dry and papery means drought.
3. Mineral Deficiency:
In Air Plants Tillandsia, nutritional yellowing tends to follow specific patterns depending on which element is lacking. Nitrogen deficiency produces uniform pale yellowing progressing from older to younger leaves as the plant pulls nitrogen from mature tissue to supply actively growing areas. Iron deficiency, which typically results from soaking water that is too alkaline rather than from genuine iron absence, creates interveinal chlorosis — yellow tissue between the leaf veins while the veins themselves remain green.
Both respond well to adding a diluted bromeliad fertiliser to the soaking routine, and iron deficiency specifically responds to ensuring soaking water has a slightly acidic pH rather than the hard, alkaline tap water that many households produce.
Air Plants Tillandsia Getting Light and Airflow Absolutely Right:
More air plants tillandsia fail from poor airflow than from poor watering, and that surprises almost everyone who hears it for the first time. Airflow is not an optional comfort feature — it is a biological requirement that determines whether moisture evaporates safely after watering or sits long enough to enable the pathogen activity that kills these plants faster than almost any other single factor.
1. Light Placement:
For Air Plants Tillandsia, the ideal light situation is indirect brightness from a spot within a couple of metres of a south or east-facing window in the northern hemisphere — close enough that the space feels genuinely bright, yet far enough that direct midday sun does not reach the leaves.
Direct afternoon sun through glass can scorch the silvery trichomes within minutes, leaving behind the bleached, papery damage that marks permanently affected tissue. Grow lights work well as supplements during winter months when natural light intensity drops — a full-spectrum LED positioned thirty to forty-five centimetres above the plants for ten to twelve hours daily maintains adequate photosynthesis through the darker months without the heat risk of older fluorescent fixtures.
2. Airflow Solutions:
In their native habitats, tillandsias grow in positions of maximum air exposure — on branch tips, cliff faces, and telephone wires where they receive constant gentle air movement that evaporates post-rain moisture within minutes. Replicating this indoors does not require elaborate equipment.
A ceiling fan running on its lowest setting, a small desk fan aimed to circulate air through the room without blowing directly onto the plants at high velocity, or simply keeping a nearby window open during mild weather provides the air movement needed. The sealed terrarium and glass globe displays beloved by social media aesthetics are, unfortunately, almost perfectly designed to kill air plants tillandsia — beautiful looking, biologically hostile to every requirement these epiphytes actually have.
3. Seasonal Adjustments:
As seasons change, the care requirements shift in ways that are easy to overlook until problems start appearing. In autumn and winter, reduce the distance between plants and light sources by twenty to thirty percent to compensate for the lower sun angle and shorter days that cut indoor light intensity significantly. In summer, move plants back from glass to prevent the sun scorch that peak-intensity sunlight can cause even on windowsills that were safe in spring. Watering frequency should track temperature and growth rate — more during warm, active growing periods, less during the slower metabolism of winter when plants sitting in cool still air dry far more slowly than they do in summer.
Air Plants Tillandsia 5 Mistakes That Kill Most Collections Fast:
These are the errors that show up most consistently in collections that are struggling. If your air plants tillandsia are declining despite what feels like reasonable care, one of these is almost certainly the cause:
- Leaving water in the crown after soaking is how most air plants tillandsia die — always shake and invert.
- Copper wire mounts slowly release toxic ions that kill mounted specimens silently over weeks without warning.
- Misting without ensuring complete drying afterward creates chronic dampness that enables the bacterial blight these plants dread.
- Sealed glass terrariums look beautiful but eliminate the airflow that makes safe post-watering drying physically possible.
- Softened or heavily chlorinated water damages trichome surfaces over time and progressively reduces how much water plants actually absorb.
Air Plants Tillandsia 5 Expert Habits That Build Thriving Collections:
Beyond avoiding the common mistakes, these are the habits that experienced air plants tillandsia collectors develop over time — the ones that make the difference between a collection that merely survives and one that genuinely thrives year after year:
- Soak and invert every specimen weekly — this one habit prevents the majority of crown rot losses in any collection.
- Monthly quarter-strength bromeliad fertilizer in soaking water drives the growth and blooming that make the hobby genuinely rewarding.
- Grouping specimens together creates a shared humidity microclimate that benefits every plant in the display naturally.
- Removing spent flower spikes promptly redirects the plant’s energy toward the pup development that expands your collection for free.
- Weekly inspection of each plant’s crown under bright light catches rot and pest problems at the stage when they are still fixable.
Air Plants Tillandsia Seasonal Care Calendar for Consistent Results:
The biggest care improvements I made with air plants tillandsia came not from changing what I did but when I did it — matching care intensity to the plant’s actual seasonal pace rather than running the same routine year-round regardless of what the plant was doing biologically. In spring, when day length increases and temperatures begin to climb, growth visibly accelerates.
New leaf growth appears at the centre of specimens. Pups push out from the bases of plants that bloomed the previous season. This is the time to increase soaking frequency from once to twice weekly, begin the monthly fertiliser additions, and check every plant in the collection carefully for any infection or pest problems that developed quietly during the lower-activity winter period before warming temperatures give pathogens the conditions they need to expand aggressively.
Summer management runs on vigilance. Heat above 90 degrees Fahrenheit stresses even robust species, and that stress creates the physiological vulnerability that Botrytis and bacterial pathogens exploit to establish infections on specimens that would have resisted them easily in cooler conditions. In rooms without air conditioning during heat waves, increase misting daily while keeping airflow high — the goal is evaporative cooling without crown saturation.
Autumn transitions everything back toward winter settings: end fertiliser additions by September, stretch soaking intervals back toward weekly as metabolism slows, and remove any dead or damaged leaves from the collection before winter. Those dead leaves harbour fungal spore populations that overwinter in the organic debris and launch the spring infection cycle that gets the new growing year off to a bad start.
Air Plants Tillandsia Choosing the Right Varieties for Your Space:
Choosing species without considering your specific environment is how most beginner air plants tillandsia collections end up fighting an uphill battle from day one. The xeric versus mesic framework is genuinely useful here — not as a rigid taxonomy but as a practical shorthand for care requirements.
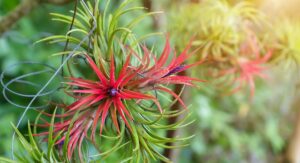
Xeric species from dry, bright Andean and desert habitats — Tillandsia xerographica, Tillandsia tectorum, Tillandsia streptophylla — have dense silver trichome coverage that reflects light, conserves moisture, and makes them forgiving of longer intervals between waterings. They look spectacular and they tolerate the lower humidity of most heated indoor spaces better than almost any other group. Their non-negotiable demand is light: without six to eight hours of bright indirect light daily, they slowly decline.
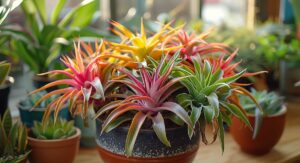
Mesic forest species are the ones that most beginners encounter first — Tillandsia ionantha, Tillandsia stricta, Tillandsia capitata, Tillandsia brachycaulos — because they are the most widely stocked by mass market retailers and the most forgiving of imperfect early care. They are greener, less silvery, and slightly more thirsty than their xeric counterparts, but they also produce the vivid blushing colour changes at bloom time that make the genus so exciting to grow.
For most people starting out, one of these is the right first purchase. Once you have the core care habits down — reliable soaking, post-soak inversion and drying, good light and airflow — moving into the xeric species and the named hybrid cultivars opens up a collecting direction that can sustain genuine interest for years. The named hybrids ‘Cotton Candy,’ ‘Houston,’ and ‘Curly Slim’ combine visual drama with robust growth habits that experienced air plants tillandsia collectors consistently rate among their most rewarding long-term specimens.
Conclusion
Air plants tillandsia are genuinely extraordinary plants — soil-free, architectural, and capable of thriving for years in the right conditions. What they are not is maintenance-free. Crown rot, leaf blight, viral damage, scale infestations, and the yellowing that comes from light deficiency and mineral buildup are all real threats, and all of them are preventable once you understand what drives each one. Apply these nine secrets consistently and the results will speak for themselves every single season without fail.
FAQ’s
Q1: How often should I water tillandsia each week at home?
Soak air plants tillandsia two to three times weekly in warm months, reducing to once weekly during cooler winter periods.
Q2: What causes leaves to turn yellow and deteriorate so rapidly?
Yellow leaves usually signal insufficient light, retained crown moisture, nutritional deficiency, or early-stage fungal infection — each needing a different response.
Q3: Can these plants grow successfully inside a sealed glass terrarium?
Sealed terrariums eliminate the airflow that air plants tillandsia require and almost always result in crown rot developing within weeks of placement.
Q4: What is the best water source to use for weekly soaking?
Rainwater, aquarium water, or filtered water works best — all avoid the chlorine and mineral salts that damage trichome function over time.
Q5: How do I identify crown rot before it becomes completely irreversible?
Look for darkened, softened tissue at the innermost leaf bases and a faint musty smell — earliest intervention gives the best recovery odds.
Q6: Do these plants need regular fertilization to bloom and grow well?
Monthly quarter-strength bromeliad fertilizer added to soaking water provides the nutrients that support reliable flowering and healthy pup production through each season.
Q7: How many light hours are needed daily to maintain healthy growth?
Six to eight hours of bright indirect light daily maintains adequate photosynthesis — north-facing windows in winter frequently fall short of this threshold.
Q8: Which mounting materials are safe and which should be strictly avoided?
Driftwood, cork bark, shells, and galvanised wire mesh are all safe — copper wire releases ions that accumulate to toxic levels over time.
Q9: How and when should I separate the pups that form after blooming?
Wait until pups reach roughly half the mother plant’s size, then separate with a gentle twisting motion or clean scissors at the base.
Summary
For Air Plants Tillandsia, long-term success with these remarkable epiphytes comes down to understanding what their leaf surfaces do — absorbing everything — and building every care habit around that biological reality. Full soaking followed by complete drying, consistent bright indirect light, constant gentle airflow, and monthly diluted fertiliser through the growing season form the core of a routine that prevents the crown rot, fungal blight, viral damage,and nutritional deficiencies that end most collections prematurely.
Get those four things right and everything else becomes manageable. The plants are genuinely rewarding once you stop treating them like ordinary houseplants and start treating them like the remarkable atmospheric organisms they actually are — something that becomes obvious the first time you watch a healthy rosette blush vivid red before throwing its first flower spike straight toward the light.